• HOME
  • DIVI BEGINNERS
  • TUTORIALS
  • TROUBLESHOOTING
  • SUBMIT A TICKET
  • HOME
  • DIVI BEGINNERS
  • TUTORIALS
  • TROUBLESHOOTING
  • SUBMIT A TICKET
home/Knowledge Base/4. Vivien Pro - Theme Settings/Vivien Pro – How to configure Contact Form

Vivien Pro – How to configure Contact Form

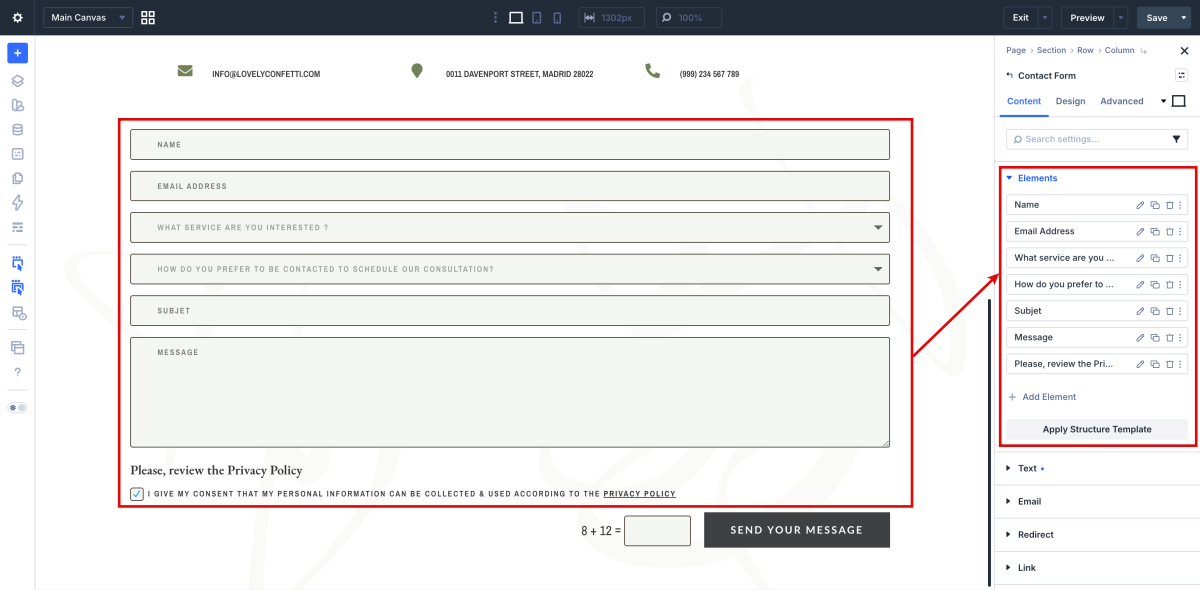
All my themes have a Contact page with a Contact Form added. You can use this to change the settings or any of the options for any of those particular fields.


The default form includes “Name”, “Email” and “Message” but you can add or take away any field that you want to.

Step 1: Add Fields you need

The default form doesn’t include Subjet or Choose your service. I wanted to put one in there to give you an idea that you can add or take away any field that you want to.

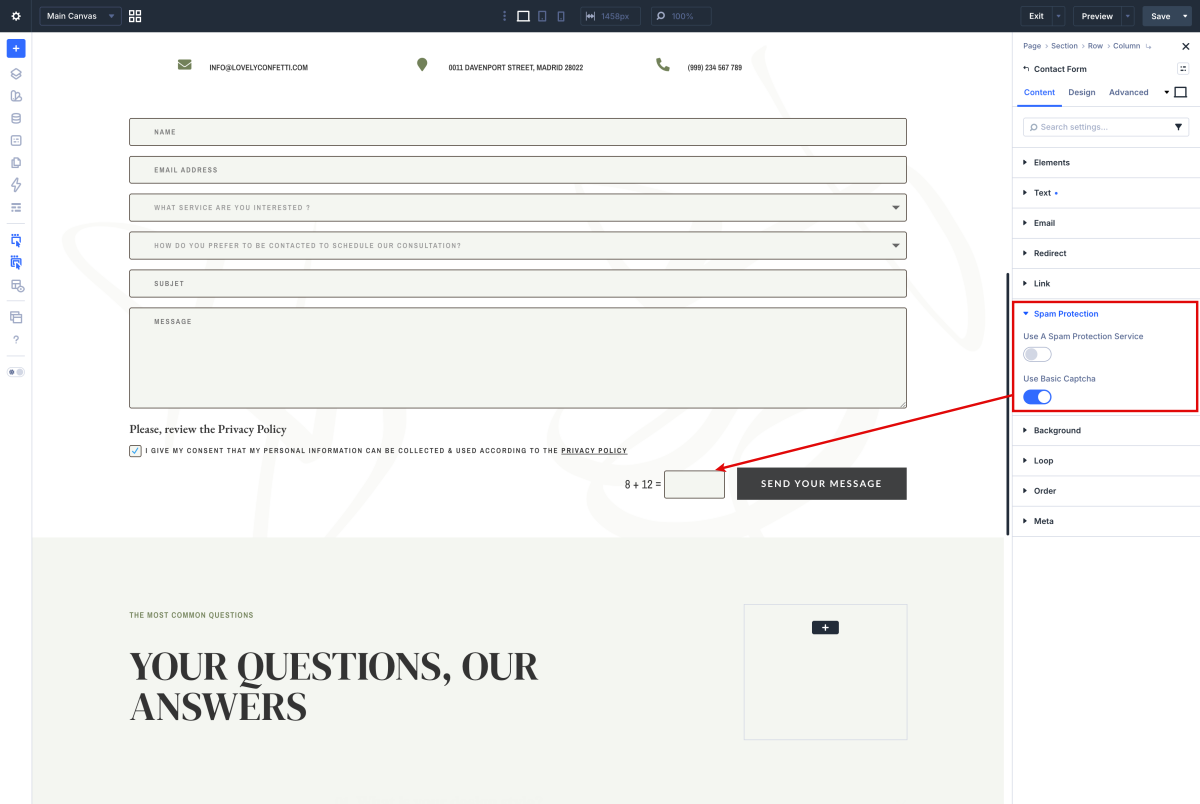
Step 2: Prevent Spam bots.

The next option is to “Display Captcha.” This is a security measure to ensure humans are filling out your form, not spam bots.


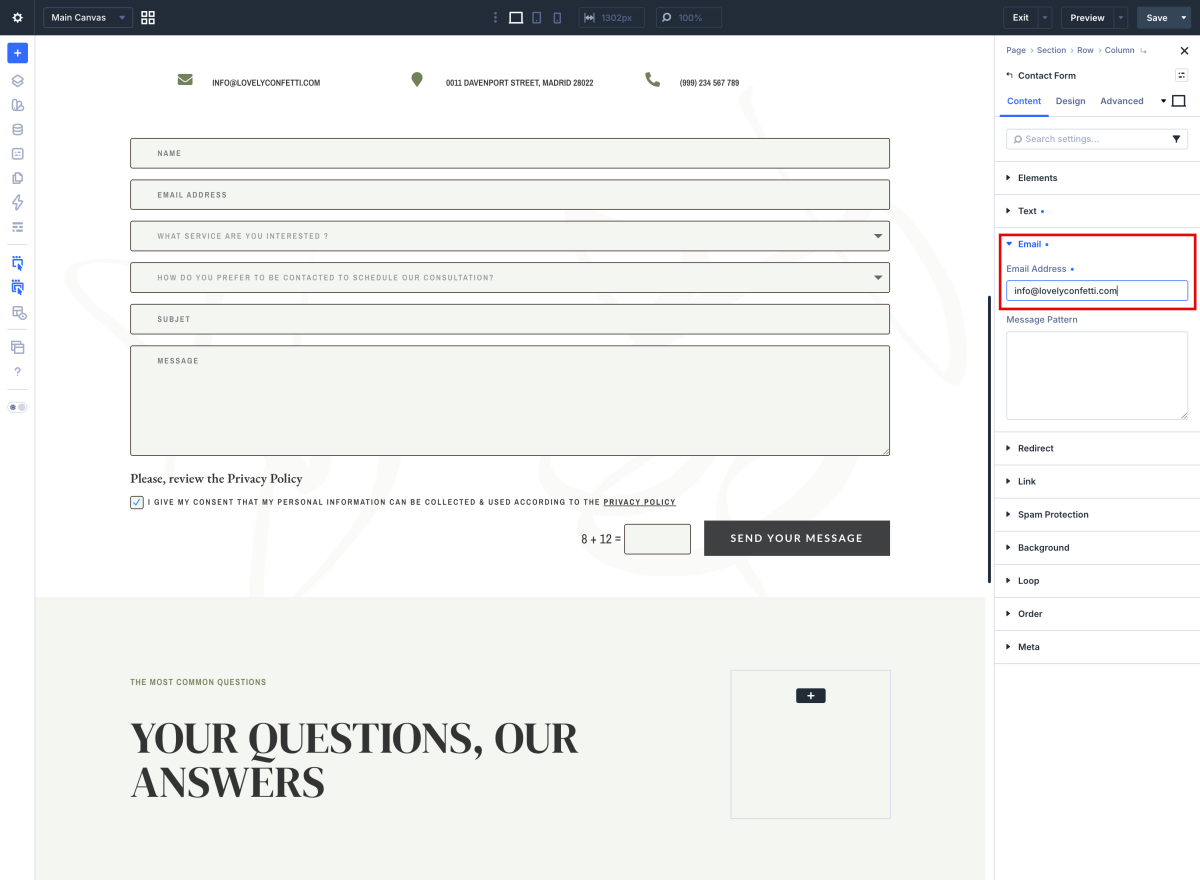
Step 3: Add email address

The second “Email” field, is the email address that you’re going to want your emails to go to when somebody fills out the form. So, a visitor comes your website, fills everything out, and hits the submit button.


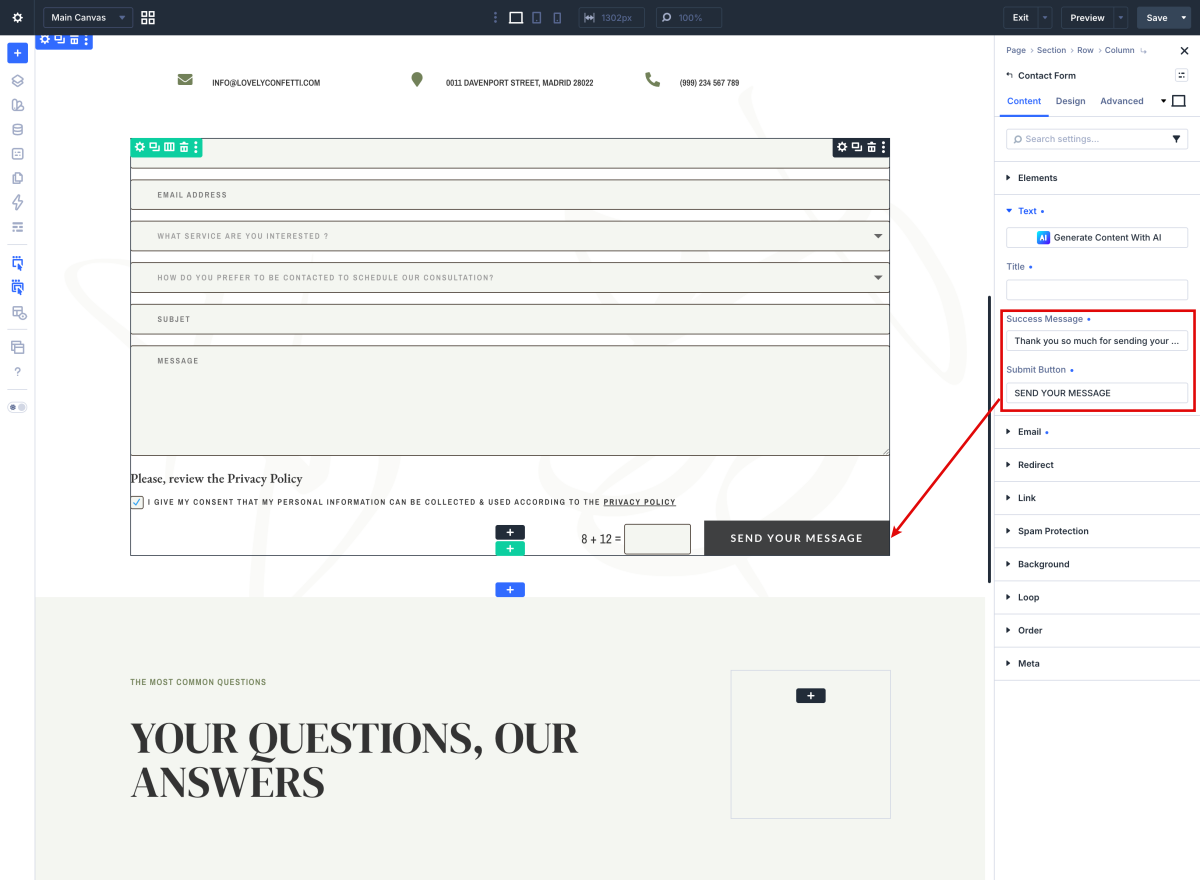
Step 4: Add Success Message

Put in a simple “Success Message,” “Thanks for signing up.” Something of that nature.

All my themes have a Contact page with a Contact Form added. You can use this to change the settings or any of the options for any of those particular fields.


The default form includes “Name”, “Email” and “Message” but you can add or take away any field that you want to.
 

Step 1: Add Fields you need

The default form doesn’t include Subjet or Choose your service. I wanted to put one in there to give you an idea that you can add or take away any field that you want to.
 

Step 2: Prevent Spam bots.

The next option is to “Display Captcha.” This is a security measure to ensure humans are filling out your form, not spam bots.

Step 3: Add email address

The second “Email” field, is the email address that you’re going to want your emails to go to when somebody fills out the form. So, a visitor comes your website, fills everything out, and hits the submit button.


Step 4: Add Success Message

Put in a simple “Success Message,” “Thanks for signing up.” Something of that nature.


Step 5: Add Privacy Policy

Take a look this tutorial: https://lovelyconfetti.com/how-to-add-privacy-policy-to-divi-contact-form/


Need Further Tutorials?

The Divi Contact Form Module: https://bit.ly/2V0UvVG

Divi Builder overiew: https://www.elegantthemes.com/documentation/divi/visual-builder/

Step 5: Add Privacy Policy

Take a look this tutorial: https://lovelyconfetti.com/how-to-add-privacy-policy-to-divi-contact-form/


Need Further Tutorials?

The Divi Contact Form Module: https://bit.ly/2V0UvVG

Divi Builder overiew: https://www.elegantthemes.com/documentation/divi/visual-builder/

Related Articles
  • Vivien Pro – How to Add a Popup Video to any Image
  • Vivien Pro – How to Design a Blog Post Template
  • Vivien Pro – How to Create an anchor text link in Galleries
  • Vivien Pro – Saving And Loading Sections In Divi
  • Vivien Pro – Saving And Loading Layouts In Divi
  • Vivien Pro – How to add Filterable portfolio
4. Vivien Pro - Theme Settings
  • Vivien Pro – How to configure Contact Form
  • Vivien Pro – Theme Options
  • Vivien Pro – How to change global colors
  • Vivien Pro – How to Import and edit Footer
  • Vivien Pro – How to Import and edit Header
  • Vivien Pro – How to add Filterable portfolio
  • Vivien Pro – Saving And Loading Layouts In Divi
  • Vivien Pro – Saving And Loading Sections In Divi
View All 10  

  Vivien Pro – How to Create an anchor text link in Galleries

Vivien Pro – How to change global colors  

  • Privacy Policy
  • Terms of Use
  • Copyright 2023. All Rights Reserved.