• HOME
  • DIVI BEGINNERS
  • TUTORIALS
  • TROUBLESHOOTING
  • SUBMIT A TICKET
  • HOME
  • DIVI BEGINNERS
  • TUTORIALS
  • TROUBLESHOOTING
  • SUBMIT A TICKET
home/Knowledge Base/4. Jane Pro - Theme Settings/Jane Pro – How to add Filterable portfolio

Jane Pro – How to add Filterable portfolio

In the Dashboard you’ll see Projects listed. Notice Projects and Posts have the same push-pin icon. Also notice they are placed strategically so you don’t accidentally create a post and think it is a project.

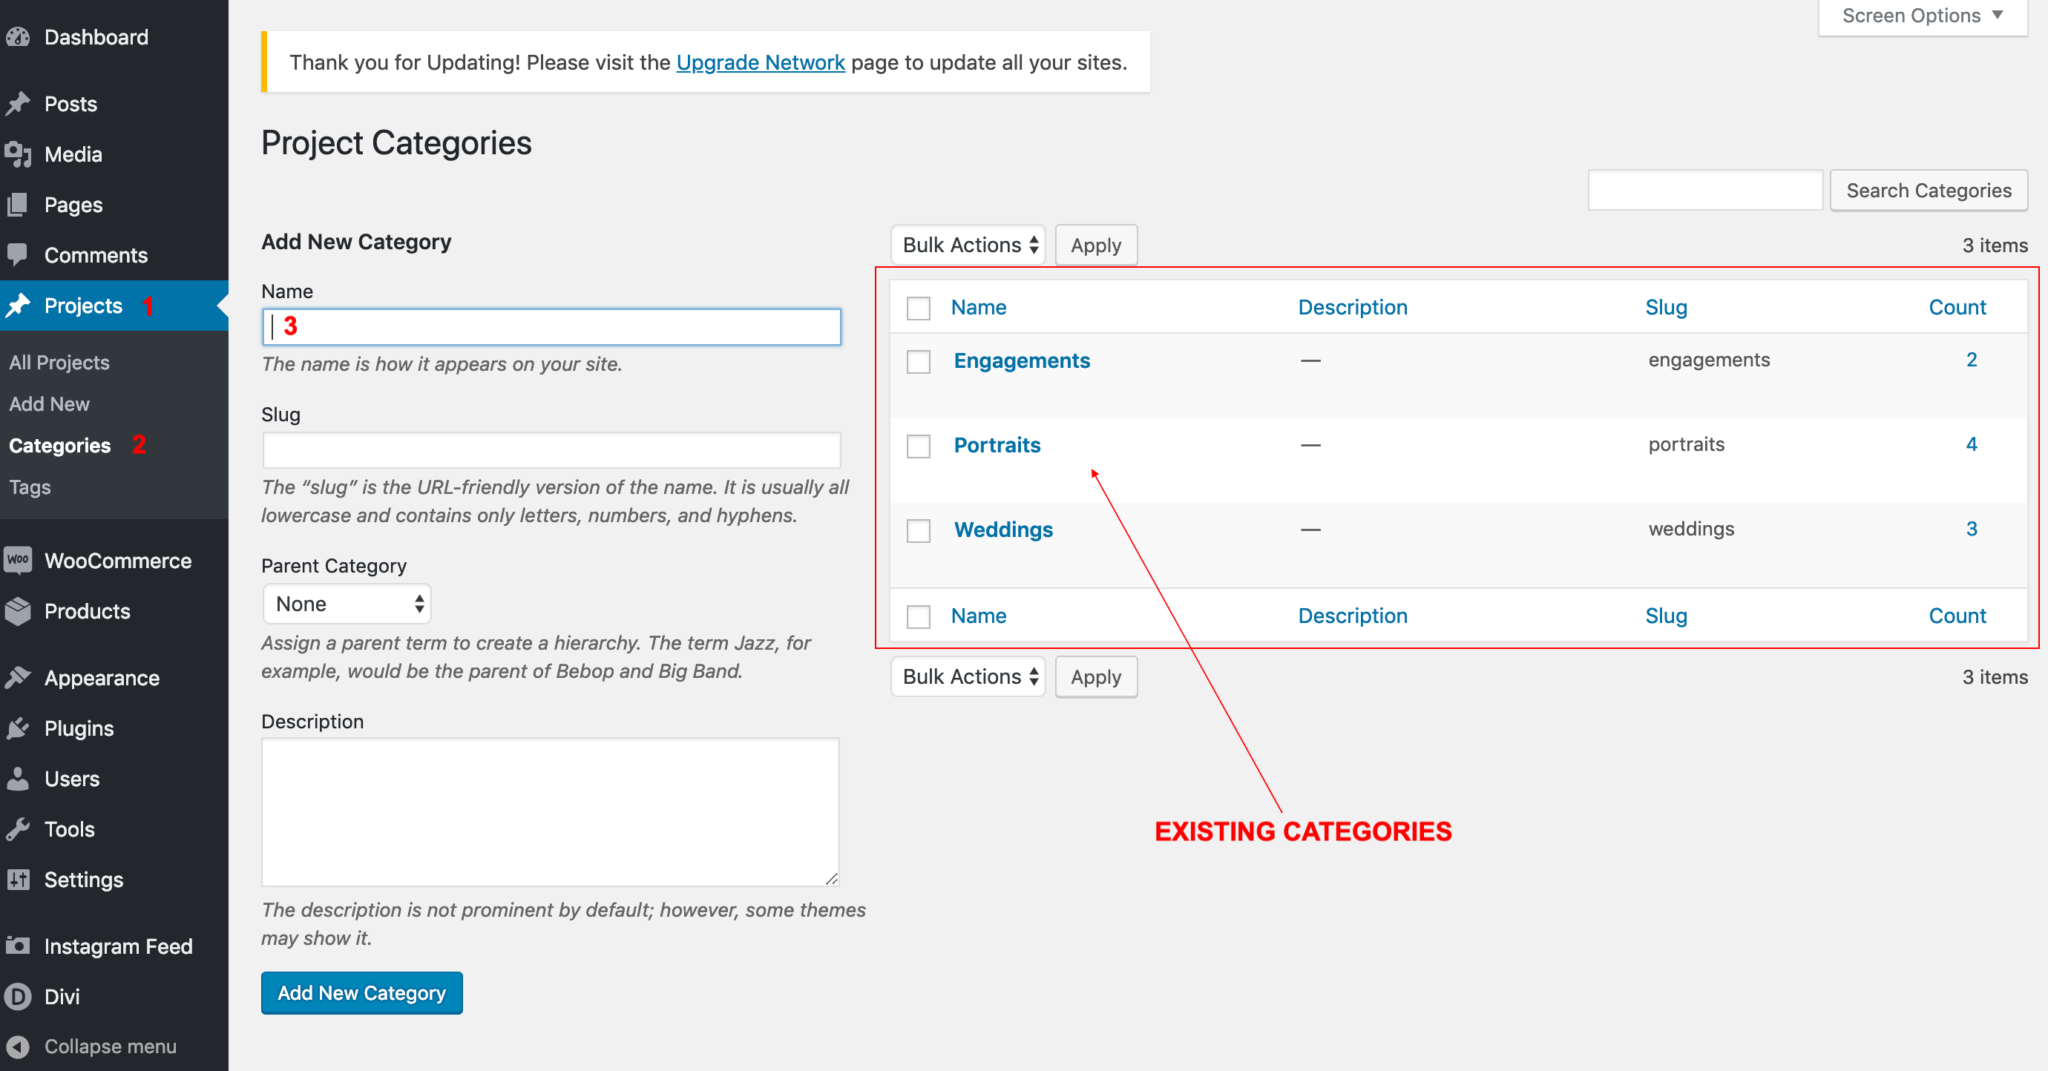
Step 1: Creating Categories

When you first create categories, ideally from your written list, create them in the page set aside for Categories. This is a great feature within WordPress, it organizes information in what I call a ‘data information page.’ Make sure you are in the Project Categories data information page which looks like this.
Step 1: Creating Projects

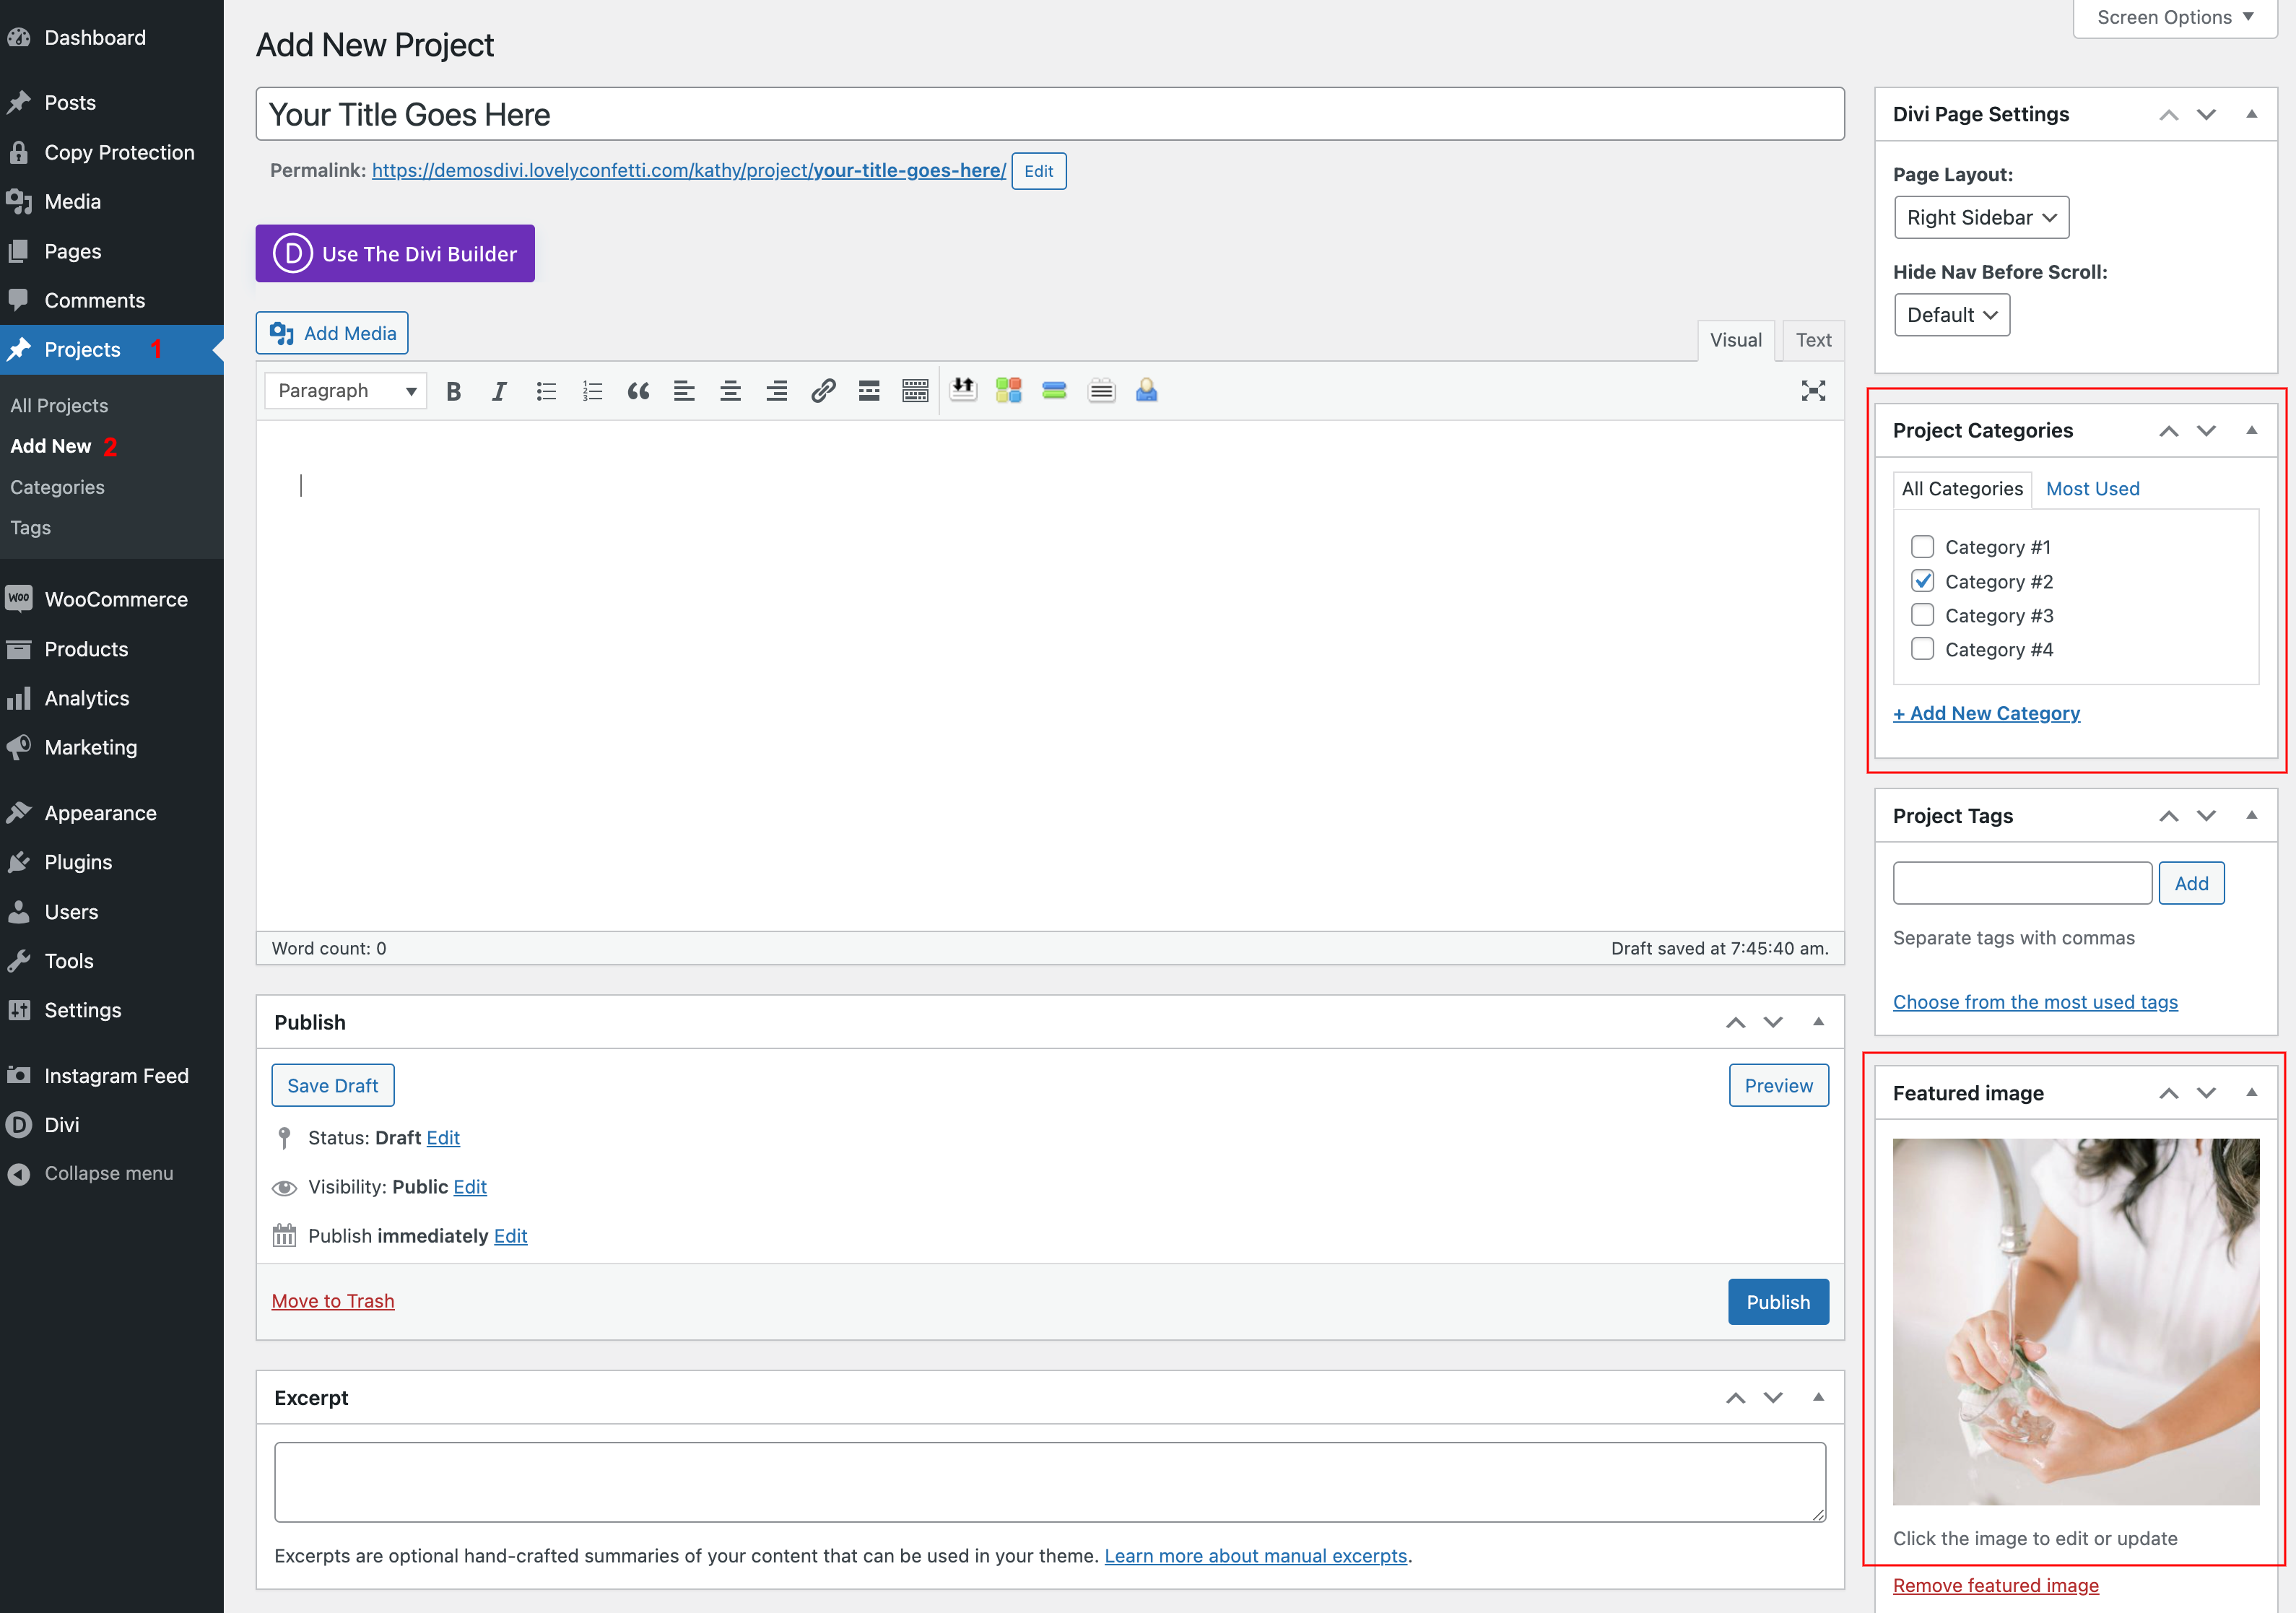
After you’ve created the categories in the main data page, the categories will show up in the right sidebar when you add a new project.

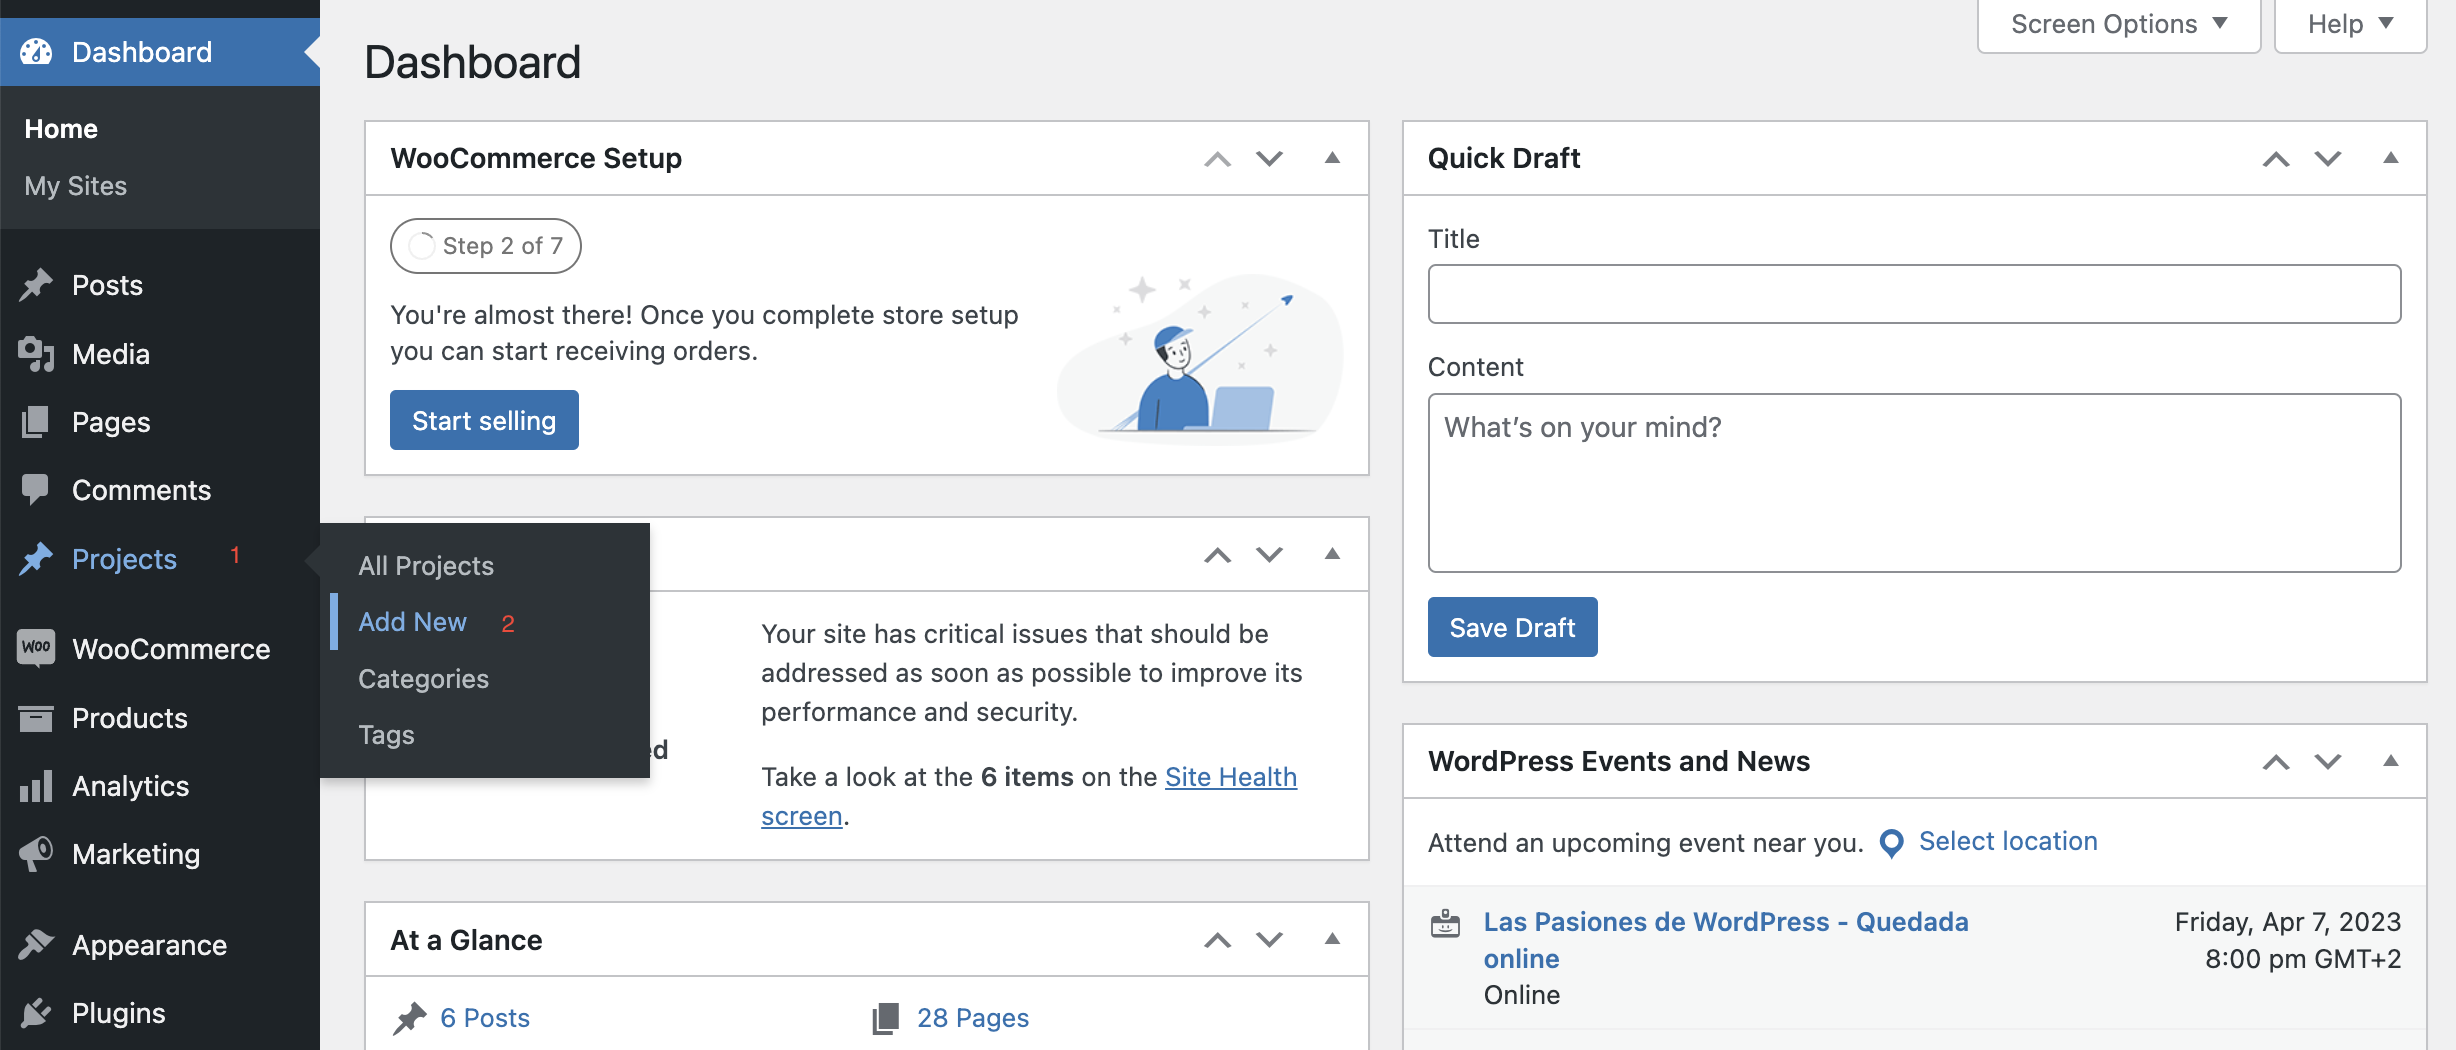
Let’s create a Project so you can see the settings. In the Projects menu find Add New.


Go to projects and click on Add New.
 

Give your project a title, assign this project to a category, if you don’t have any yet you can create here one and give it a check.

Then set a featured image. This is the image that you will see on the portfolio page.
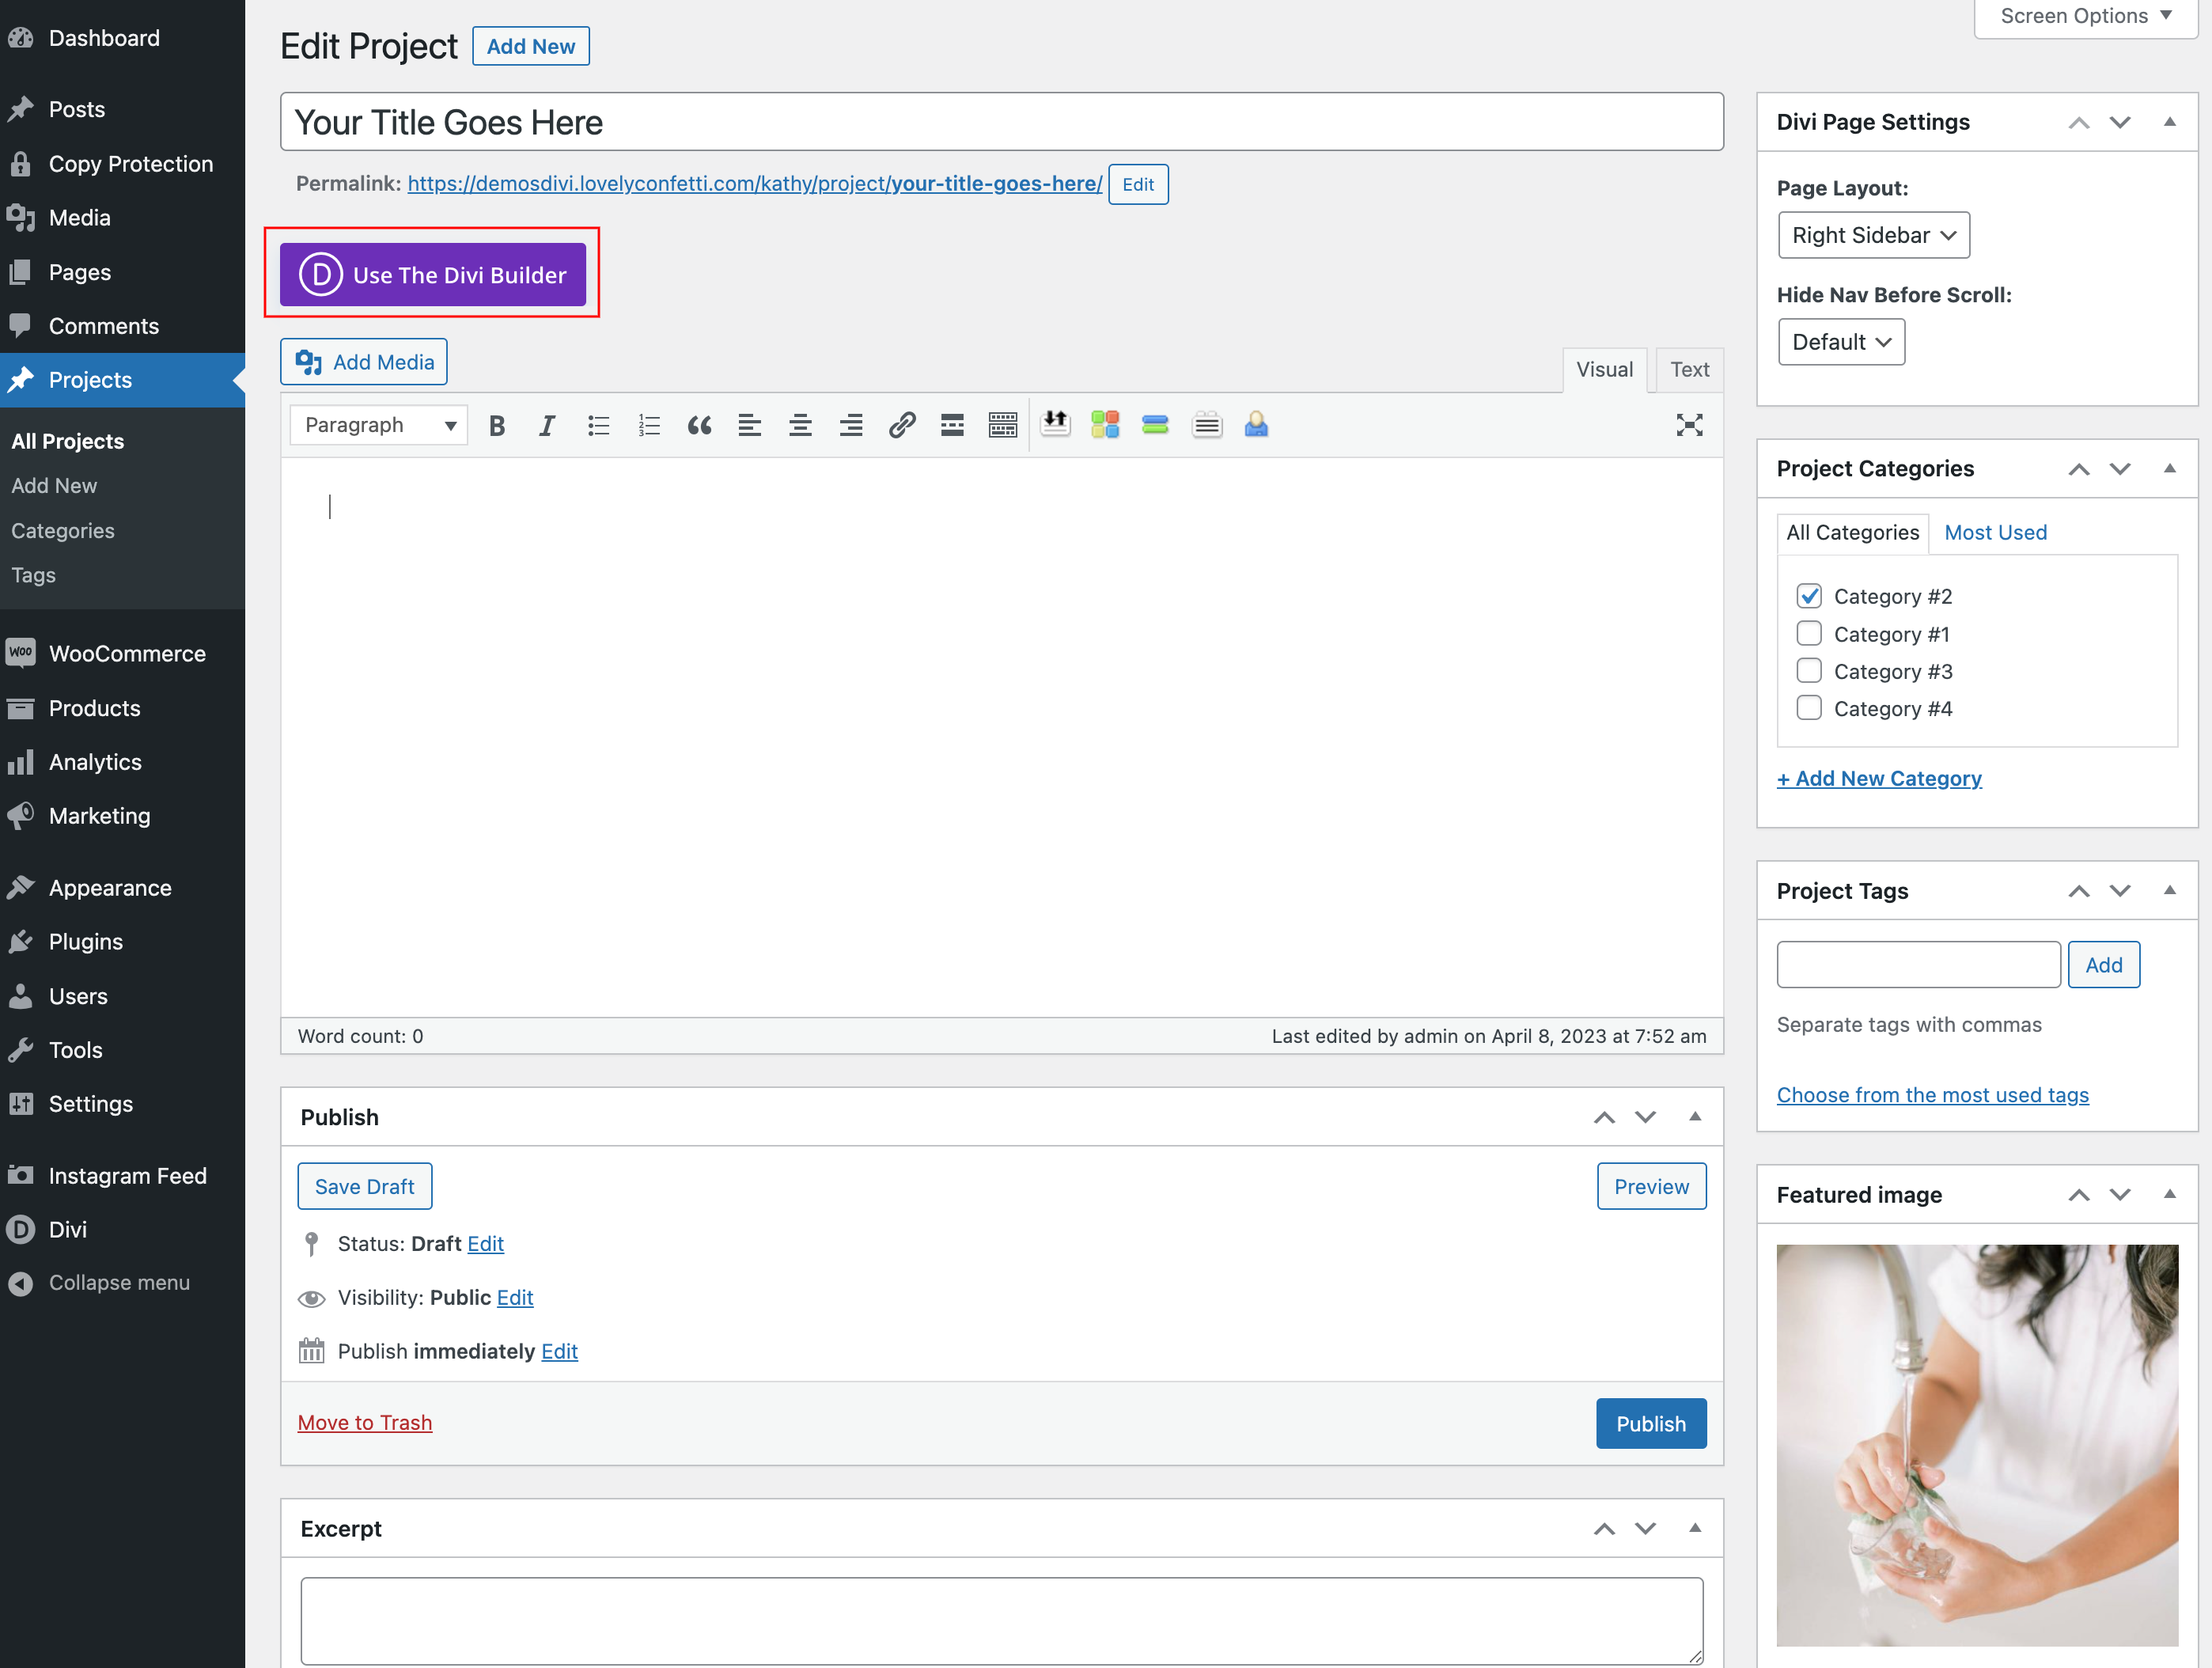
And click on Use Divi Builder.
 

Step 3: Enable the Divi 5 Visual Builder

With your new page open in the editor:

  1. Click Use Divi Builder.

  2. WordPress reloads the page on the front end with the Divi 5 Visual Builder active.

Divi now shows a three-option modal:

  • Build From Scratch

  • Choose A Premade Layout

  • Build with AI

For this article, click Choose A Premade Layout.


Step 4: Browse the premade layout library

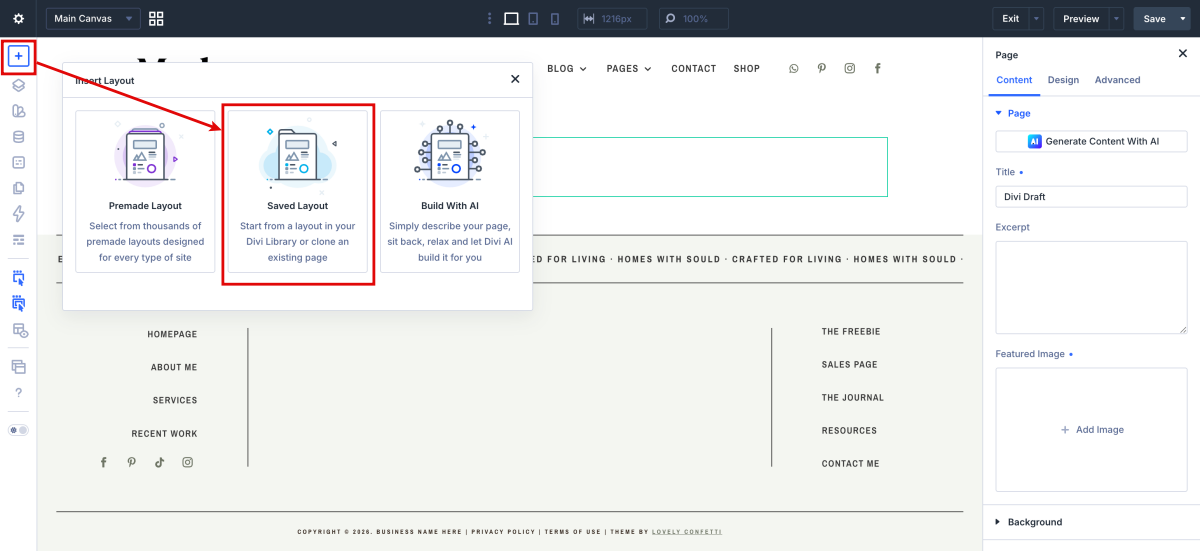
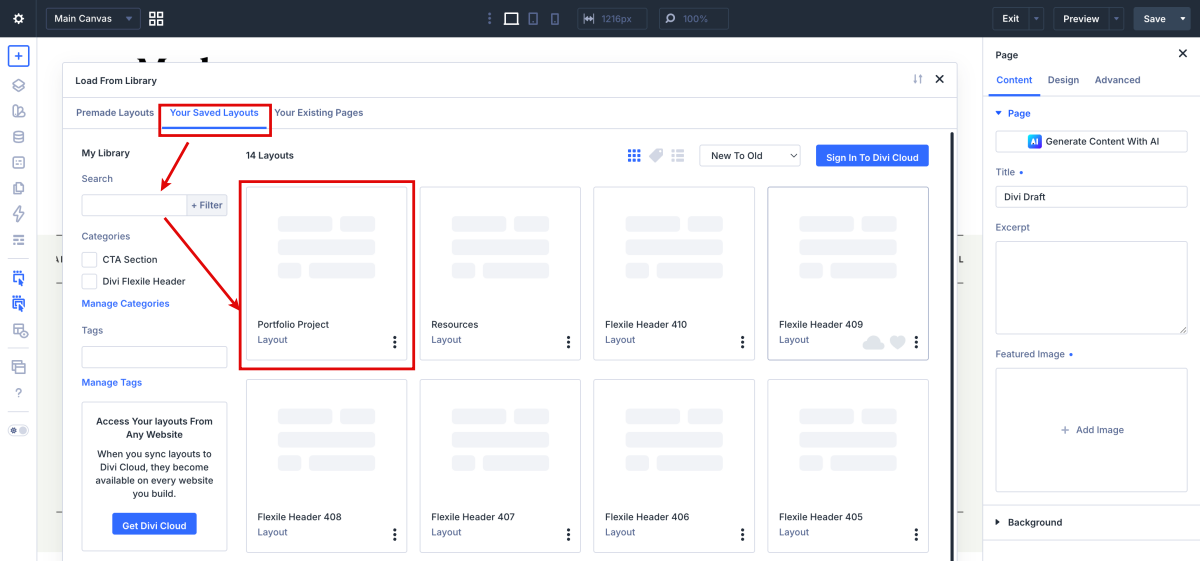
When you choose Choose A Premade Layout, Divi opens the layout library. Here you’ll see:

  • A tab for Premade Layouts (by Elegant Themes).

  • Tabs for Your Saved Layouts and Your Existing Pages, which you can ignore for now.


Then click on Publish.

https://www.support.helplovelyconfetti.com/wp-content/uploads/2021/02/Olivia-Create-a-Portfolio-Post.webm


Step 5: Save, exit the builder, and publish your page

When you’re happy with the page:

  1. Click the Publish or Save button in the Divi’s top toolbar.

  2. Click the Exit button in Divi’s top toolbar to see the page as a regular visitor.

Related Articles
  • Jane Pro – How To Add A Marquee Banner
  • Jane Pro – How to add lovely icons to Blurbs
  • Jane Pro – How to Create an anchor text link in Resources and Sales Page
  • Jane Pro – How to Design a Product Page Template
  • Jane Pro – How to Design a Blog Post Template
  • Jane Pro – Saving And Loading Sections In Divi
4. Jane Pro - Theme Settings
  • Jane Pro – How to add Filterable portfolio
  • Jane Pro – How to change global colors
  • Jane Pro – How to Import and edit Footer
  • Jane Pro – How to Import and edit Header
  • Jane Pro – How to configure Contact Form
  • Jane Pro – Saving And Loading Layouts In Divi
  • Jane Pro – Saving And Loading Sections In Divi
  • Jane Pro – How to Design a Blog Post Template
View All 11  

  Jane Pro – How to add lovely icons to Blurbs

Jane Pro – How To Add A Marquee Banner  

  • Privacy Policy
  • Terms of Use
  • Copyright 2023. All Rights Reserved.