Creating Divi Portfolio Project Posts
In the Dashboard you’ll see Projects listed. Notice Projects and Posts have the same push-pin icon. Also notice they are placed strategically so you don’t accidentally create a post and think it is a project.
Step 1: Creating Categories
When you first create categories, ideally from your written list, create them in the page set aside for Categories. This is a great feature within WordPress, it organizes information in what I call a ‘data information page.’ Make sure you are in the Project Categories data information page which looks like this.
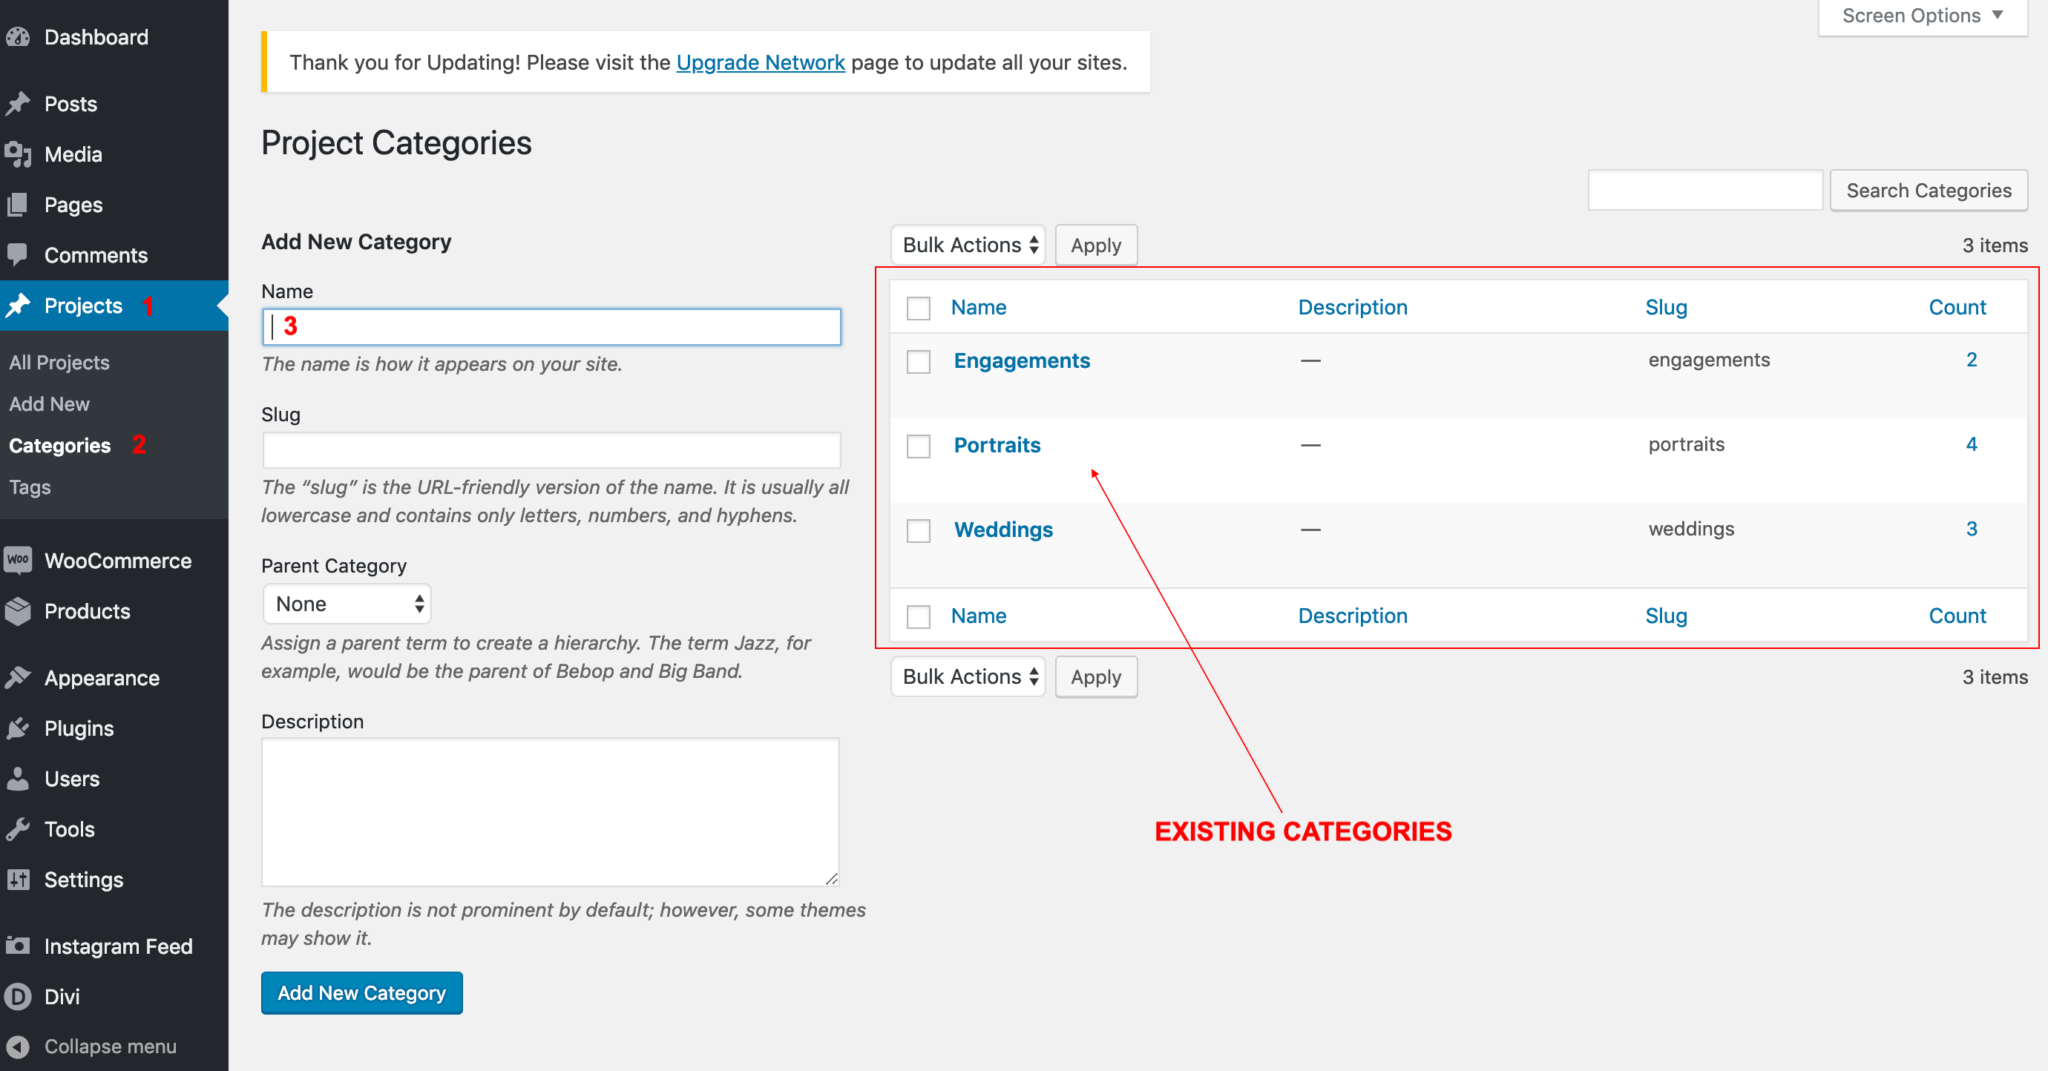
After you’ve created the categories in the main data page, the categories will show up in the right sidebar when you add a new project.
Step 2: Creating Projects
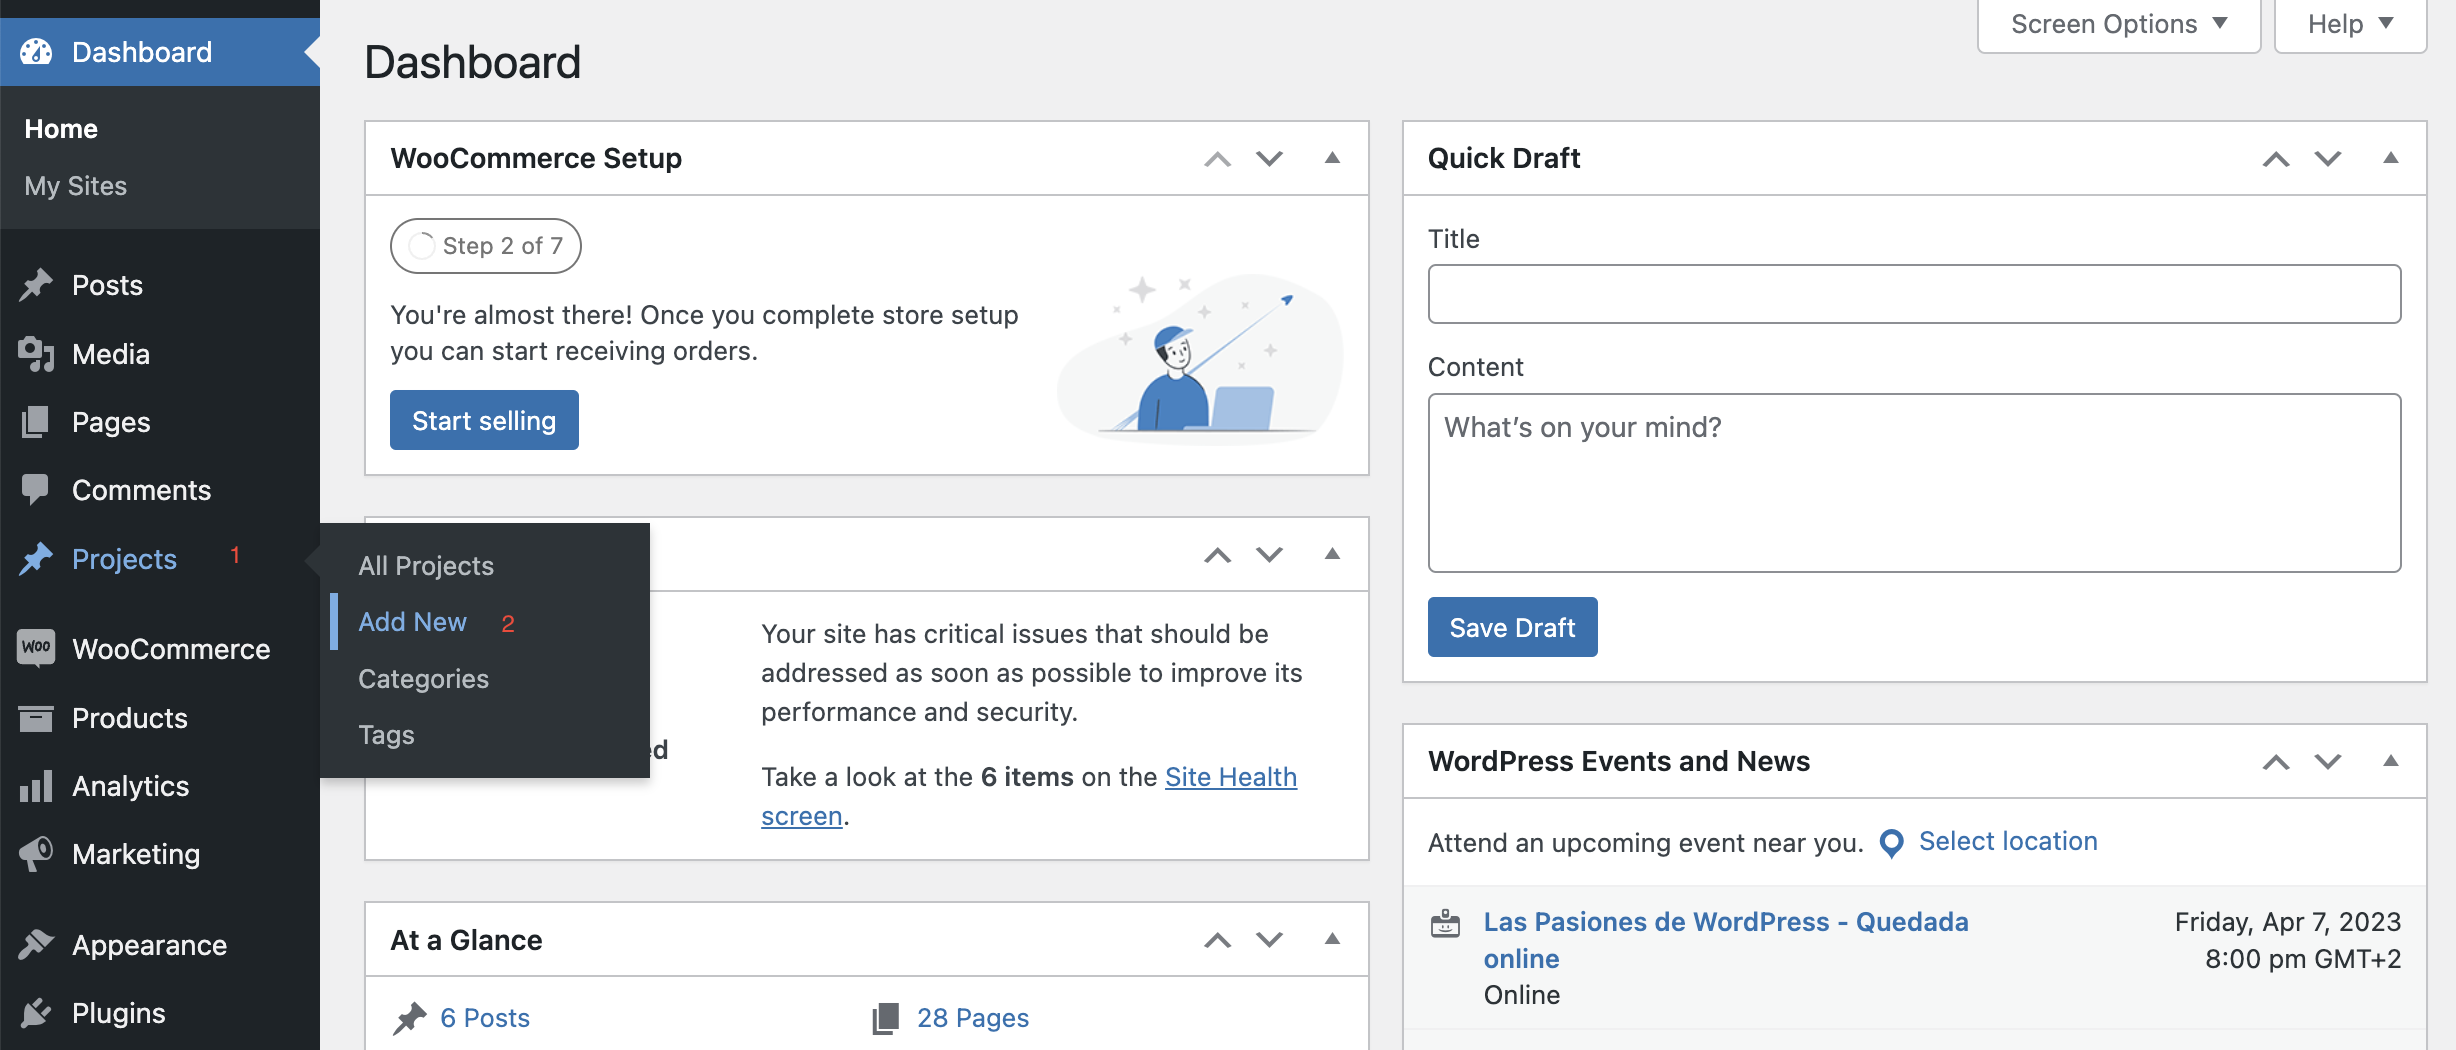
Let’s create a Project so you can see the settings. In the Projects menu find Add New.
Go to projects and click on Add New.
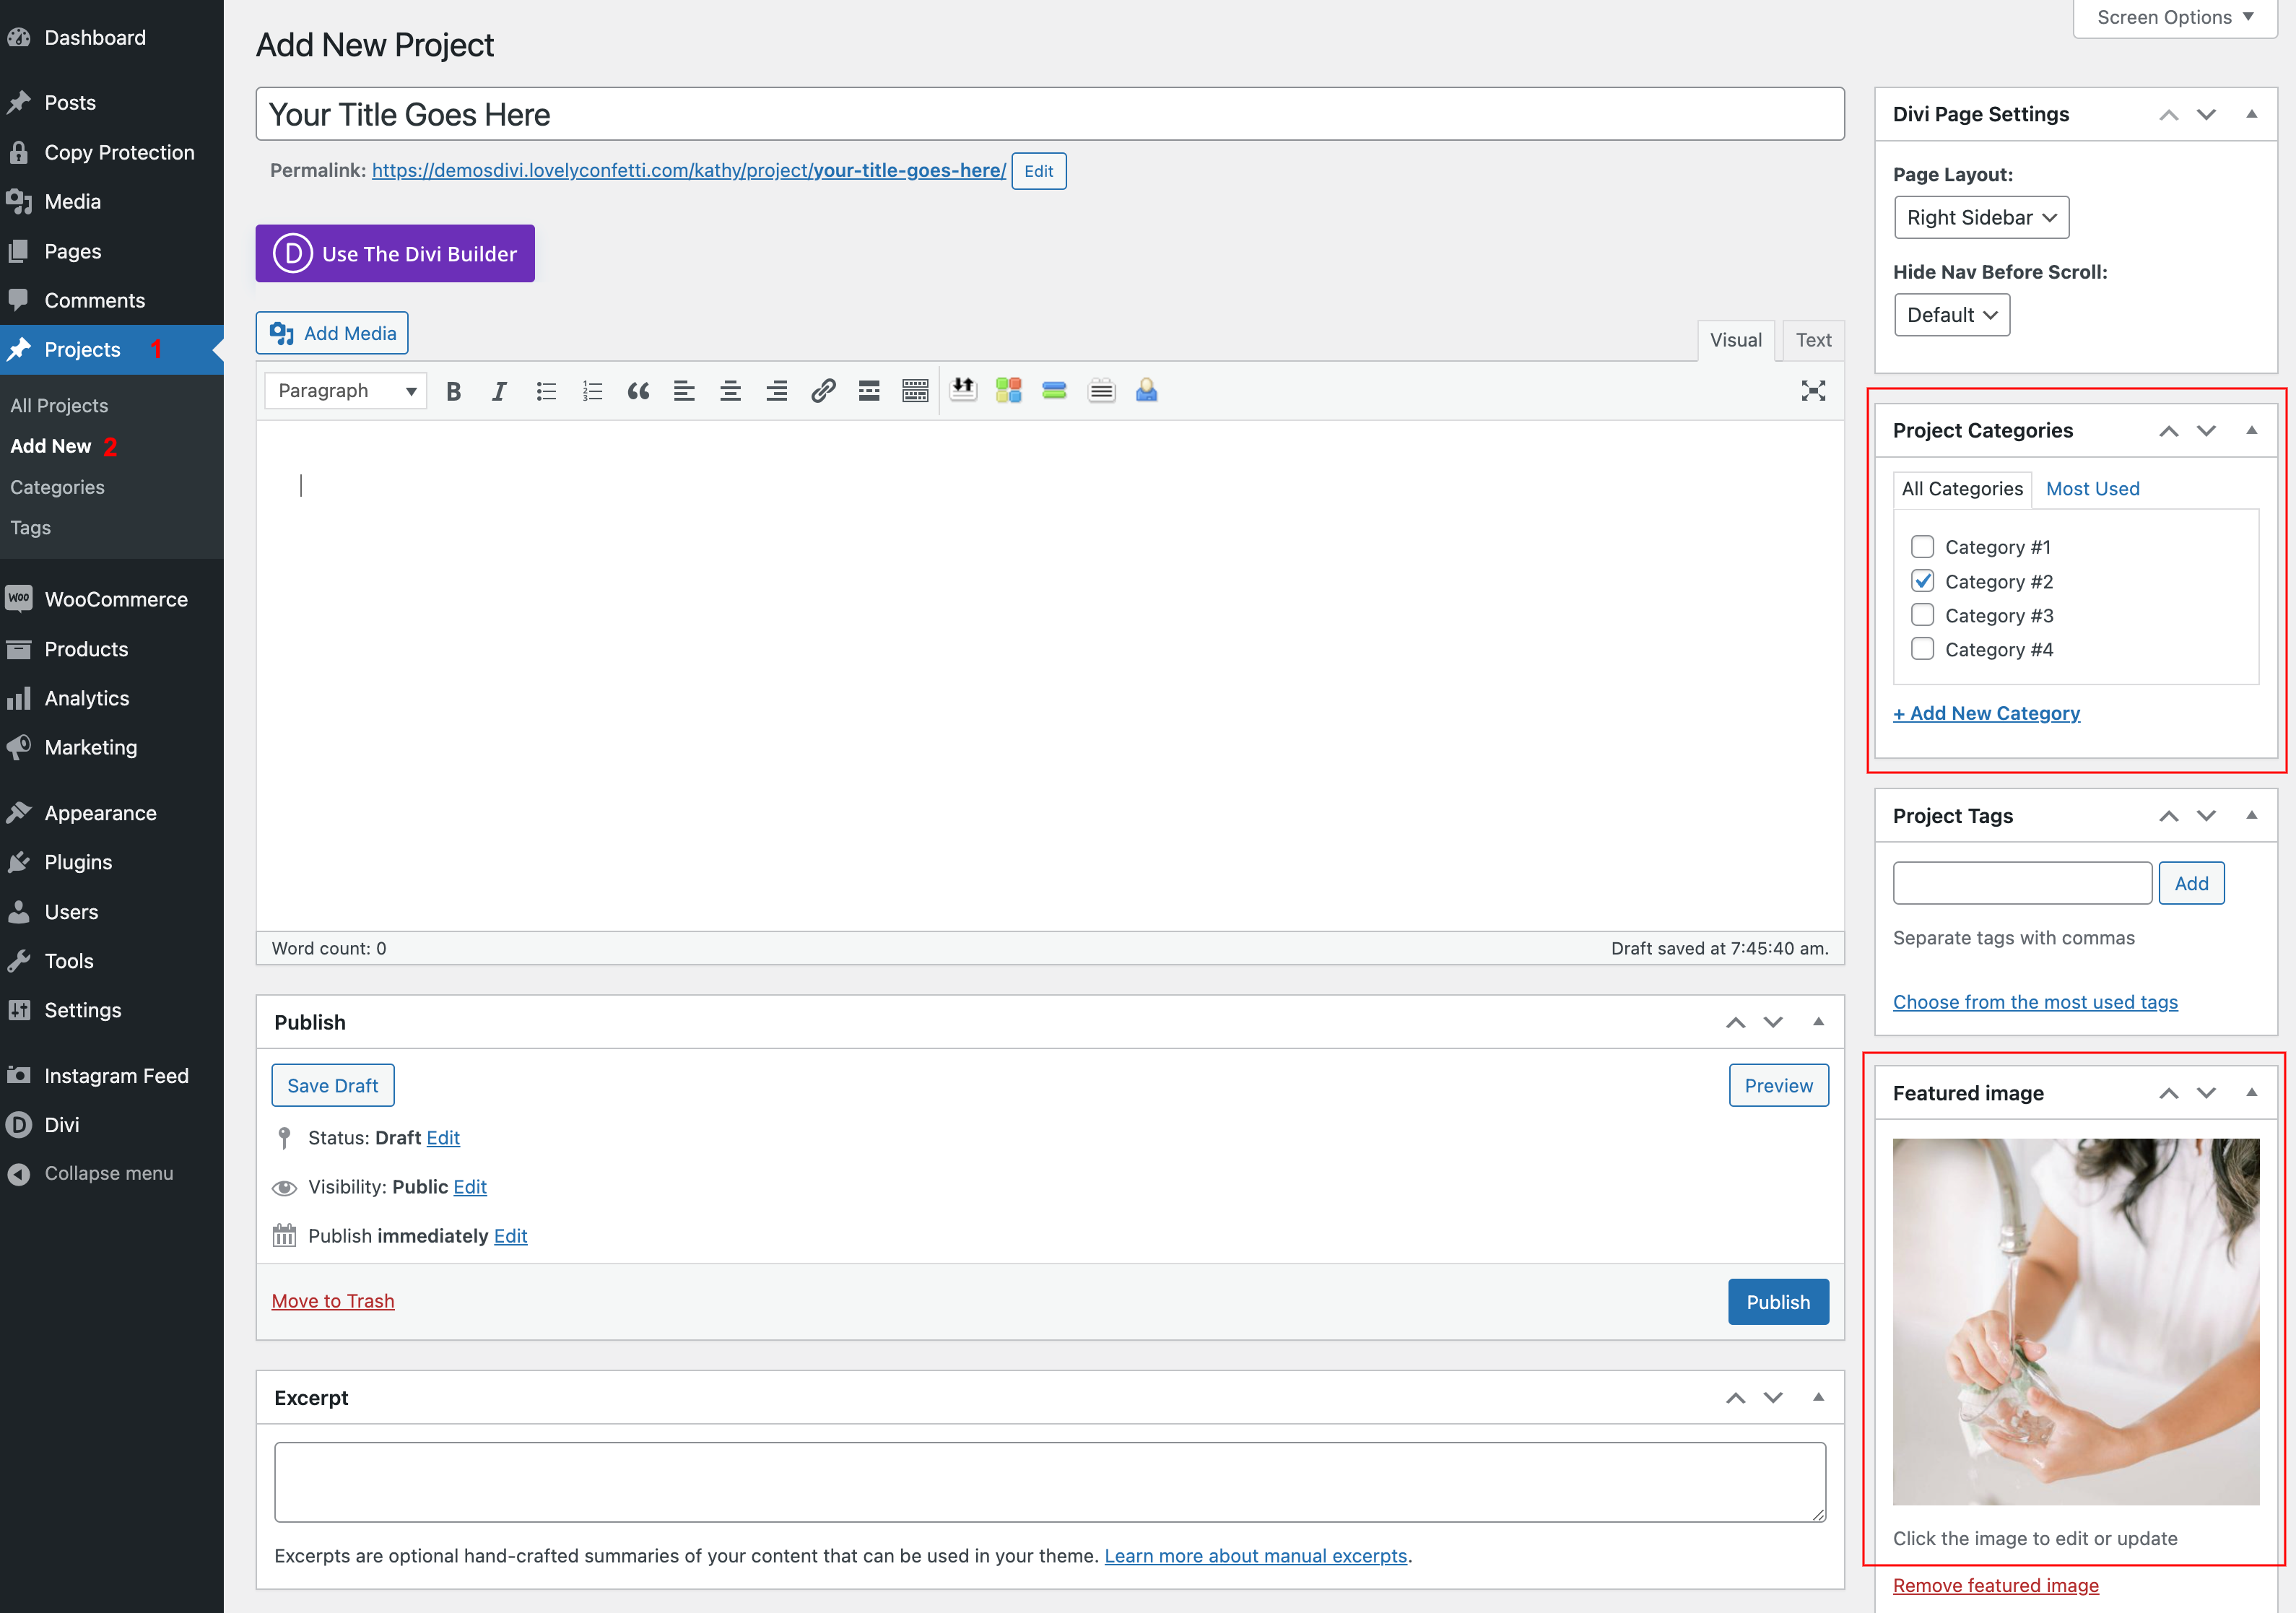
Give your project a title, assign this project to a category, if you don’t have any yet you can create here one and give it a check.
Then set a featured image. This is the image that you will see on the portfolio page.
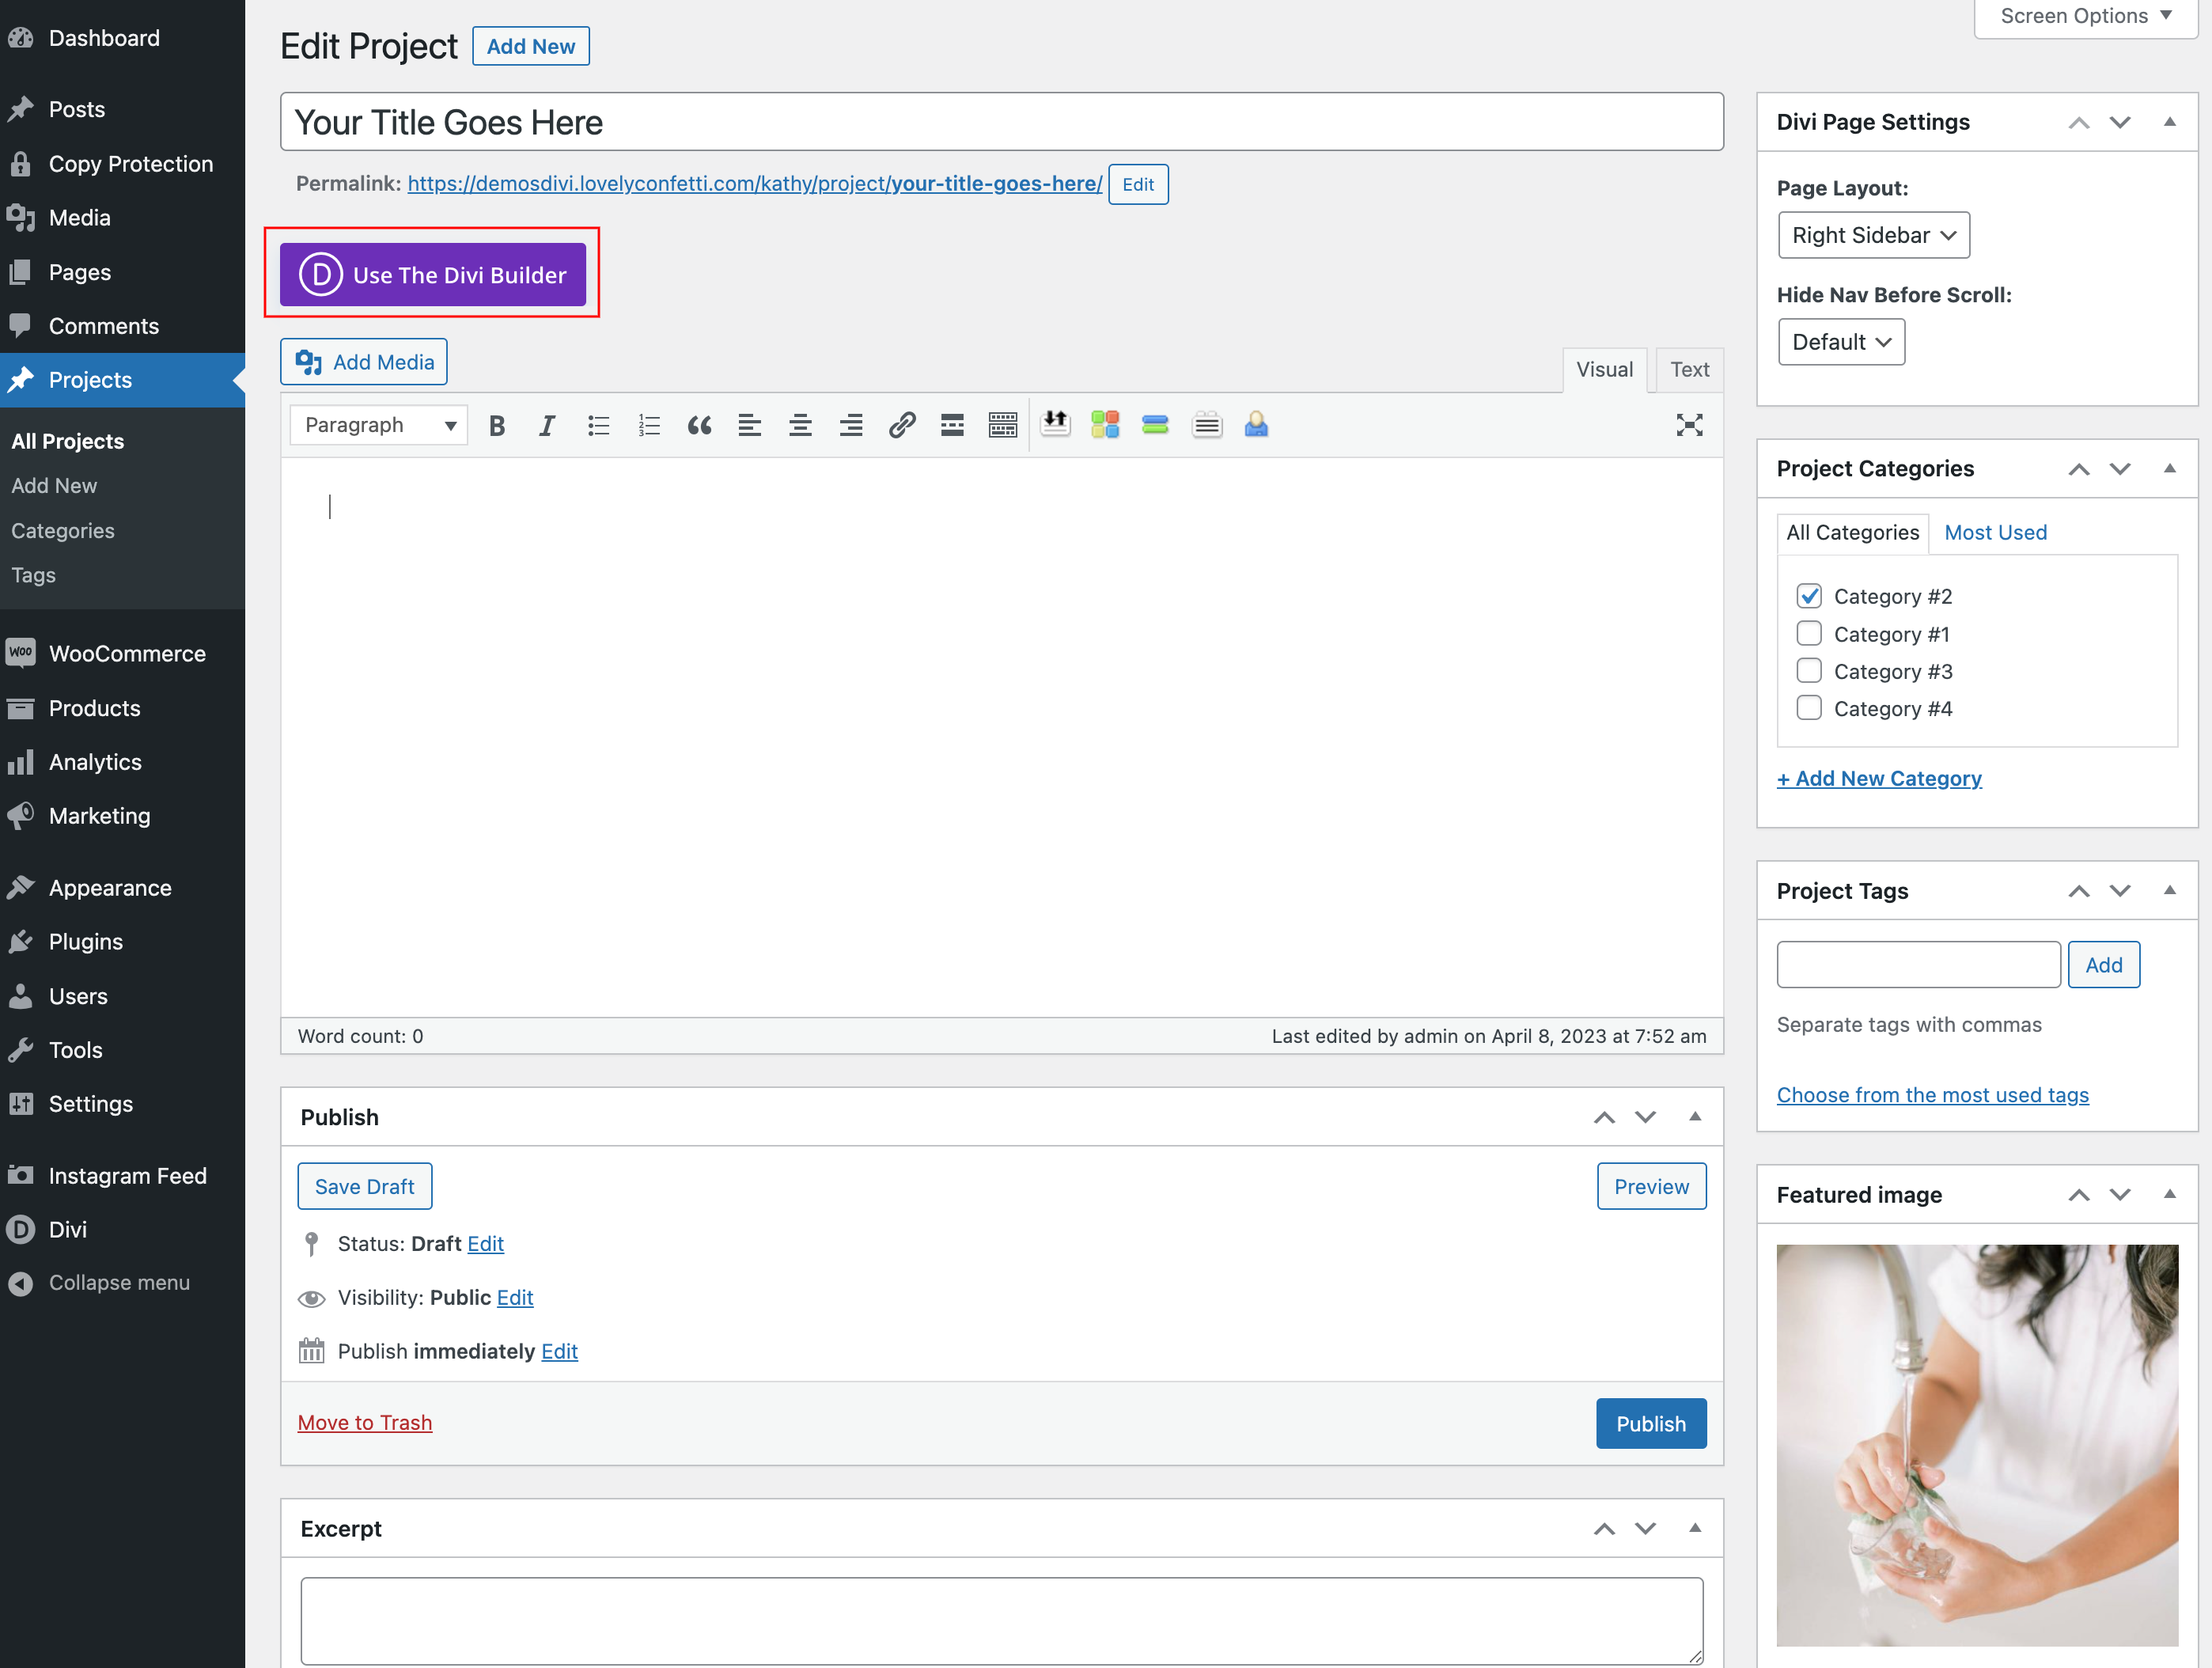
And click on Use Divi Builder.
On the next screen choose a premade layout or create one from scratch.
Step 3: Enable the Divi 5 Visual Builder
With your new page open in the editor:
-
Click Use Divi Builder.
-
WordPress reloads the page on the front end with the Divi 5 Visual Builder active.
Divi now shows a three-option modal:
-
Build From Scratch
-
Choose A Premade Layout
-
Build with AI
For this article, click Choose A Saved Layout.
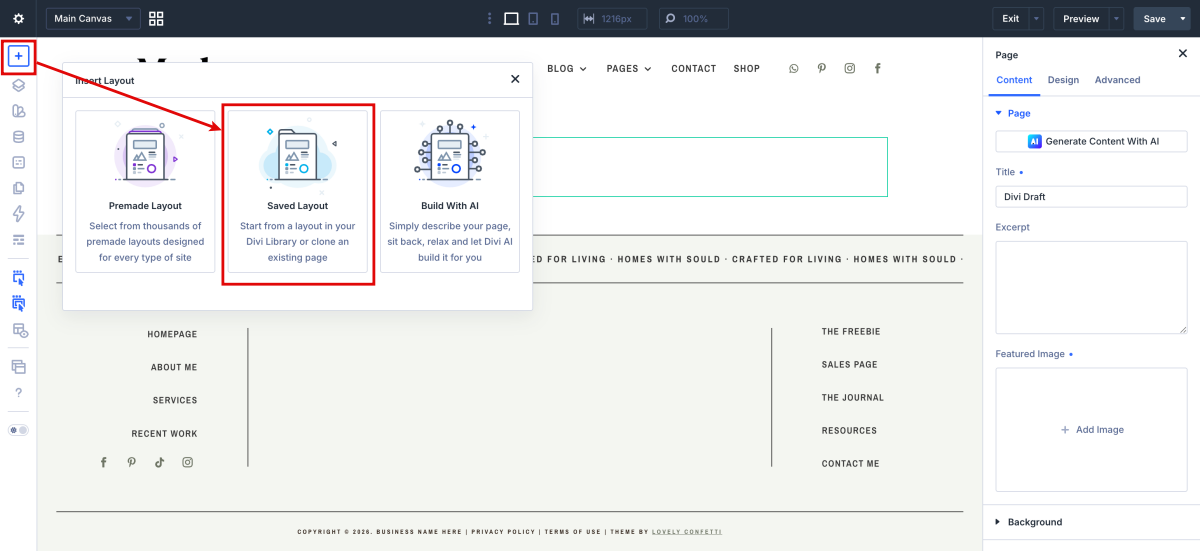
On the next screen go to Your saved layouts and click on Single Portfolio Layout.
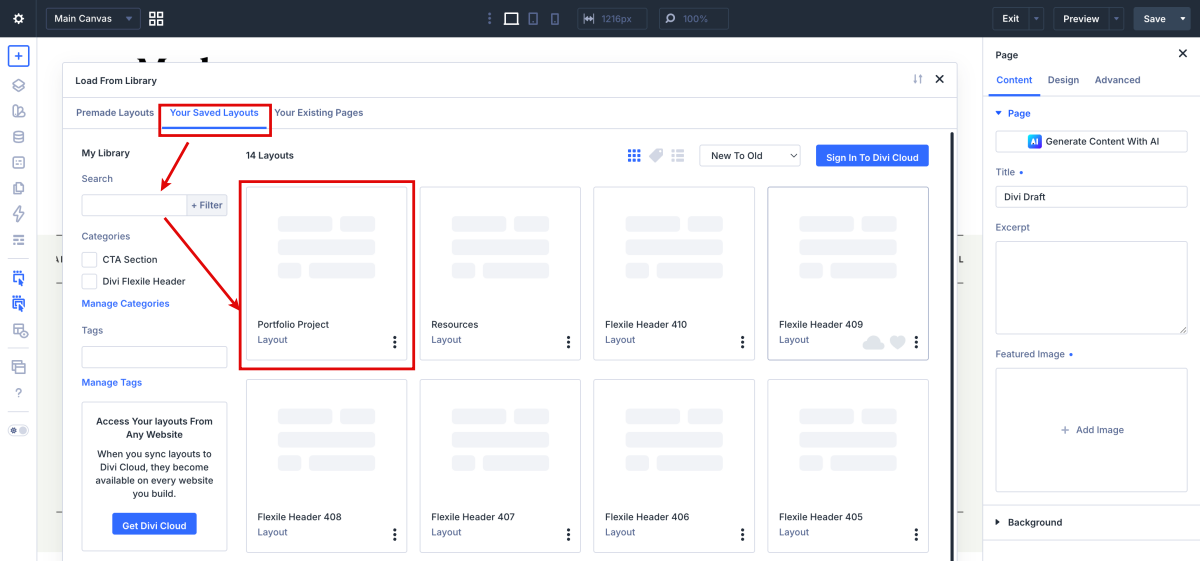
Then click on Publish.