• HOME
  • DIVI BEGINNERS
  • TUTORIALS
  • TROUBLESHOOTING
  • SUBMIT A TICKET
  • HOME
  • DIVI BEGINNERS
  • TUTORIALS
  • TROUBLESHOOTING
  • SUBMIT A TICKET
home/Knowledge Base/2. Halle Pro – Use Divi Visual Builder/Halle Pro – How to edit Featured Work

Halle Pro – How to edit Featured Work

How to edit Featured Work in Home 1 & 3

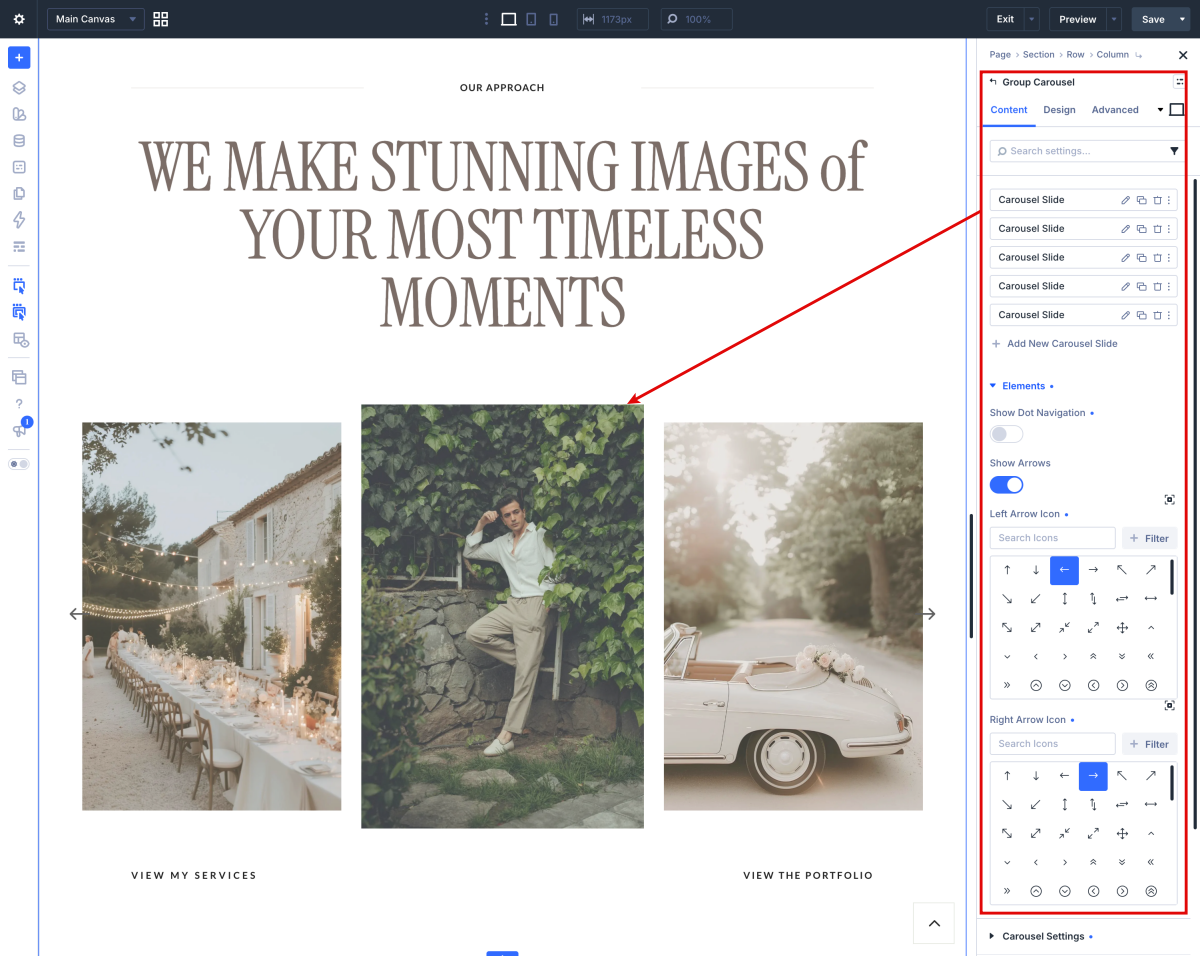
Slider carousel runs with Image Carousel Module For Divi plugin preinstalled.

If you haven’t installed it yet, you have to install it.

The first step is to install the plugin on your website. If you are new to WordPress and aren’t sure how to install a plugin then please check How to install a WordPress Plugin article.


Selecting Images for the Carousel

  1. Click on Enable Visual Builder in the top bar.
  2. Go to Module Settings > Content > Images.The Add Gallery Images button will open the WordPress Media Library. You can choose images already uploaded to the media library or upload new images here.


In this tutorial I show you how to change image sizes: https://bit.ly/3zjZzVZ


Changing Number of Slides and Scroll Settings

You can change the number of images in the carousel under Module Settings > Content > Elements > Slide Count.

You can change the number of slides that scroll when you press the Arrow icon or on Autoplay by changing the Slides Scroll setting. It is at Module Settings > Content > Elements > Slides Scroll

By default it is is set to 1. Meaning it will move one slide forward or backward depending on the arrow icon clicked. Changing it to 2 will move the carousel 2 slides.


Choose the layout

You can change layout (Default, Center Mode or Synced Slider).

Center Mode is a centered slick carousel centrat, that has the active slider scaled.

Infinite Animation

Infinite Animation setting is at Module Settings > Design > Carousel Animation.

Setting Infinite Animation to Yes will loop the carousel infinitely.

When the carousel reaches the last image it will start from the first image again. When Infinite Animation is disabled the carousel will stop at the last image.


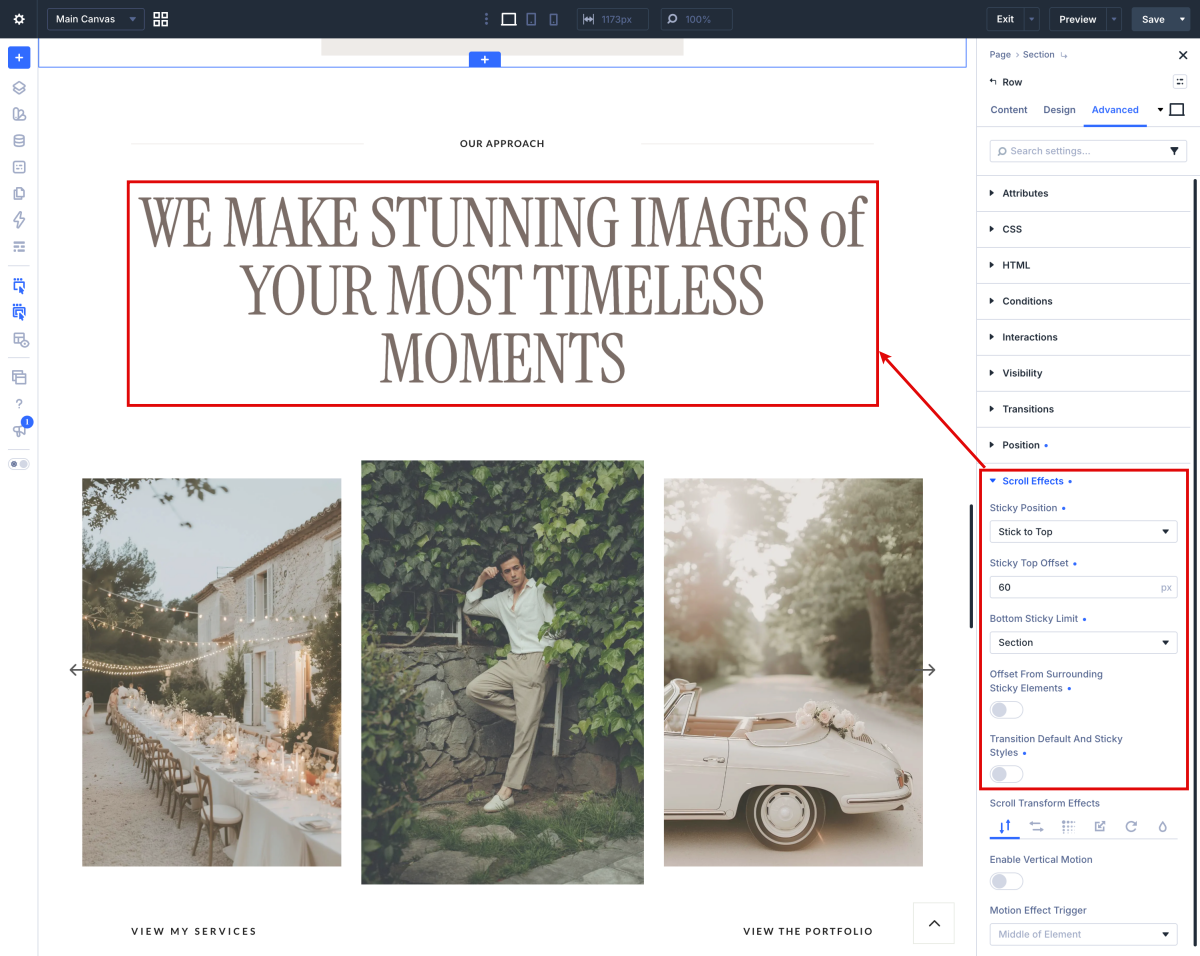
How to Make Any Divi Page Element Sticky

The table containing the title of this section is sticky to top. Sticky (or fixed) elements are parts of a website that remains in place as the user scrolls down the page.

The first step to making an element sticky is to open the page you want to work with. Because this isn’t a global or extended setting and only applies to a single element, we will be working directly within a page (or theme builder layout). Be sure to open it in the Divi builder to edit.


How to edit Hero in Home 2

  1. Log into WordPress
  2. Click on Enable Visual Builder in the top bar.
  3. Edit texts and images.


https://www.support.helplovelyconfetti.com/wp-content/uploads/2025/08/HallePro-Gallery-Home-2.webm


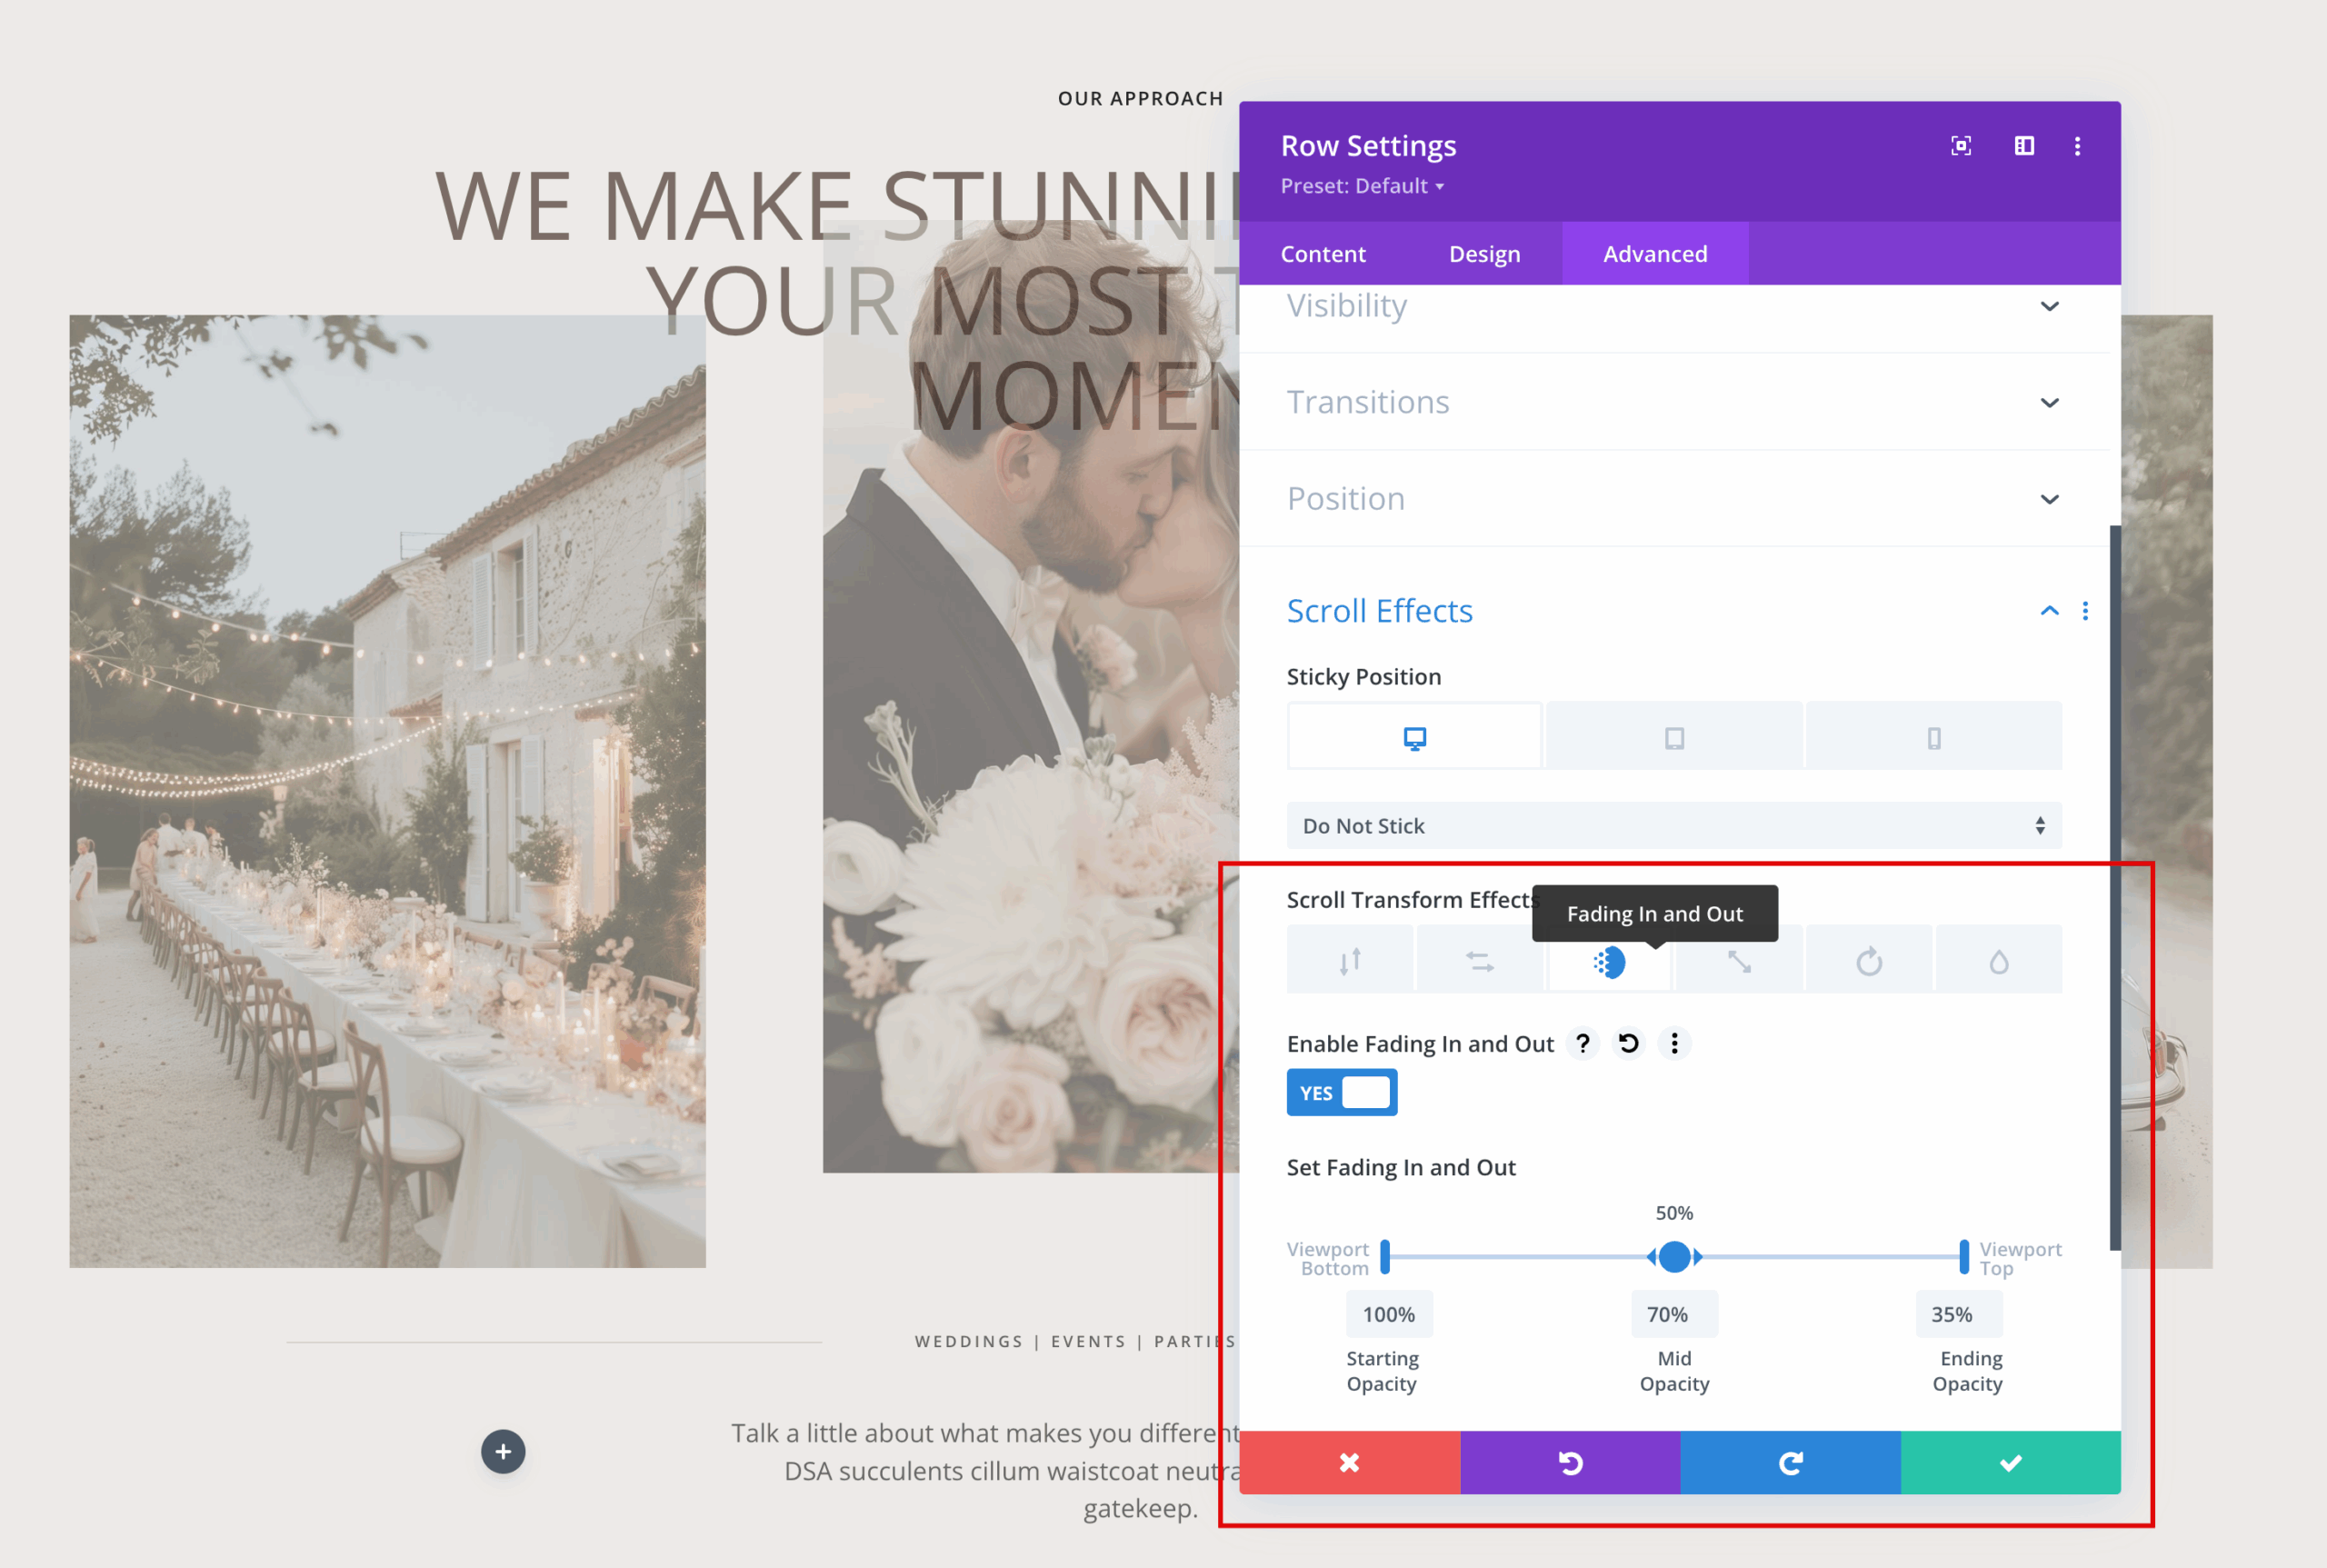
How to Make Any Divi Page Element fade out

To make a Divi module fade out on scroll, you can utilize the built-in scroll effects feature. Navigate to the advanced tab of the module, section, or row you want to animate. Then, go to scroll effects and enable “Fading In and Out”. Adjust the starting, mid, and ending opacity and viewport percentages to control when and how the fade occurs as the user scrolls.
Related Articles
  • Halle Pro – How to edit Testimonials
  • Halle Pro – How to edit About
  • Halle Pro – How to edit Services
  • Halle Pro – How to edit Hero
  • Halle Pro – How to edit texts
  • Halle Pro – How to edit images
2. Halle Pro – Use Divi Visual Builder
  • Halle Pro – How to edit Featured Work
  • Halle Pro – How to enable the Divi Visual Builder
  • Halle Pro – Choose your Home
  • Halle Pro – How to edit images
  • Halle Pro – How to edit texts
  • Halle Pro – How to edit Hero
  • Halle Pro – How to edit Services
  • Halle Pro – How to edit About
View All 8  

  Halle Pro – How to edit Hero

Halle Pro – How to edit About  

  • Privacy Policy
  • Terms of Use
  • Copyright 2023. All Rights Reserved.