Step 1: Add your logo
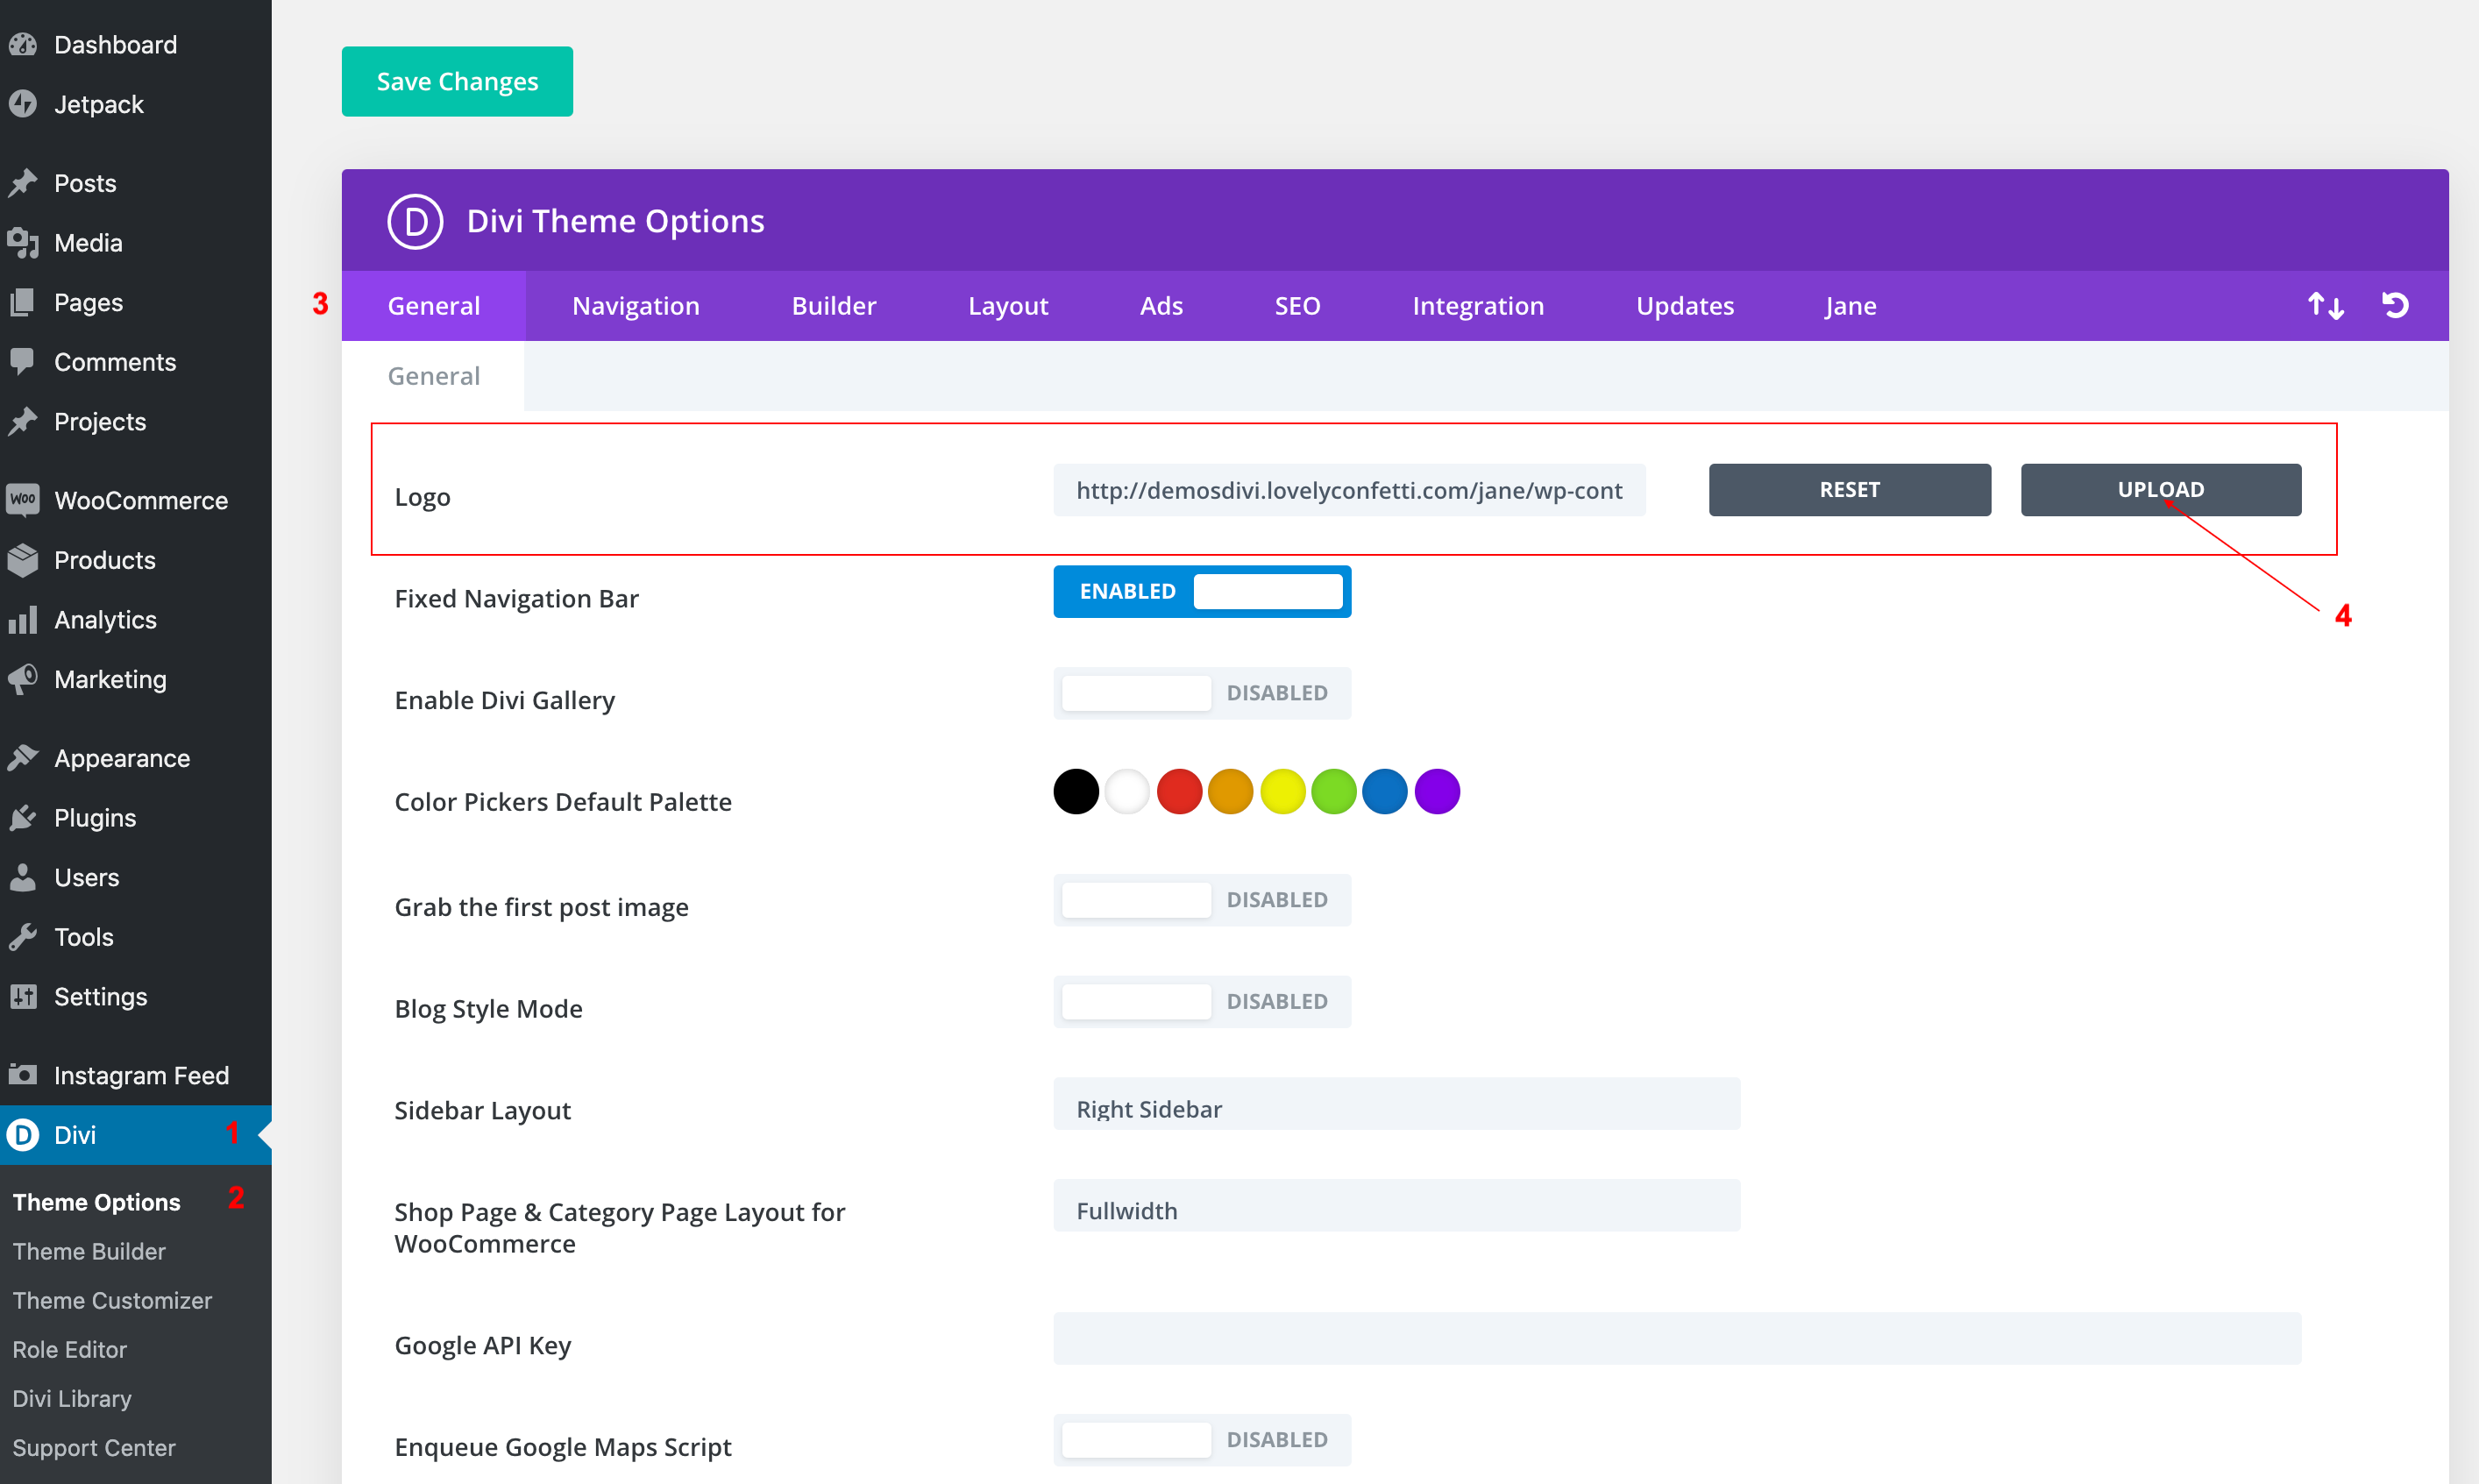
To begin, add a logo to your site by navigating to the Divi Theme Options > General tab and clicking Upload from the Logo option.
Step 2: Create the menu
If your menu is already set up, skip this step. If not, navigate to Appearance > Customize and wait for the Customizer Settings panel to open. Alternately, you could set up your menu using the Appearance > Menu console.
Once inside the Customizer Settings, click on the Menus tab and then click Create New Menu.

Give your menu a unique name, assign it to the Primary Menu location and clickNext. In the following options, click Add Items and select the relevant Pages, Posts, Custom Links etc., that you’d like to add to your header menu.
Step 3: Header Format
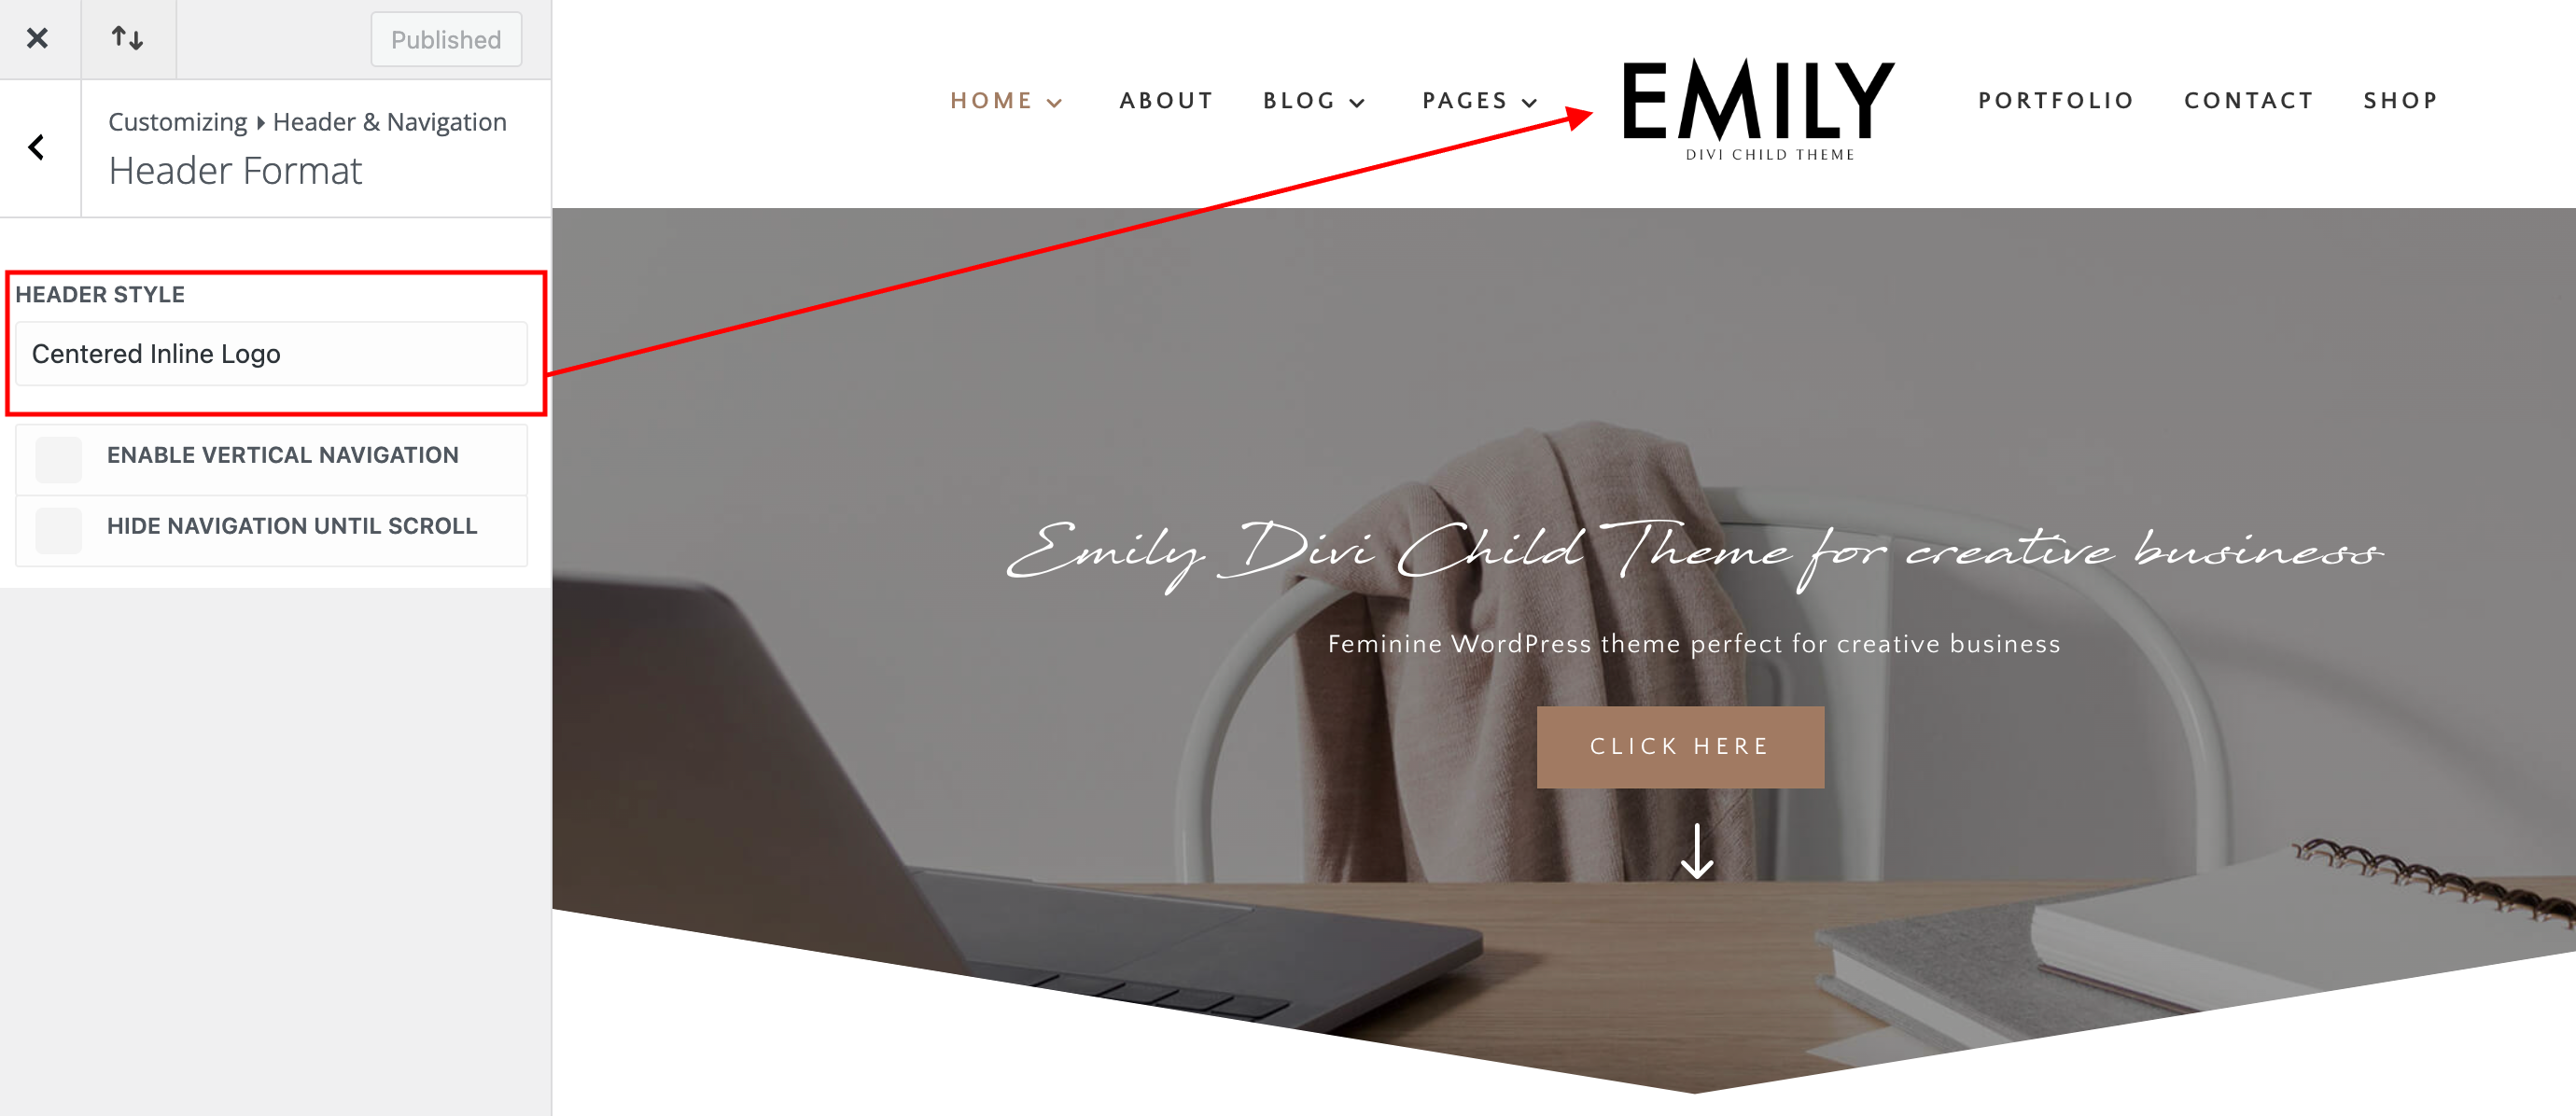
Go to Appearance > Header & Navigation > Header Format > Choose your own
Here you can adjust your header’s general format, such as switching between the main layouts modes: Default, Centered, Centered Inline Logo, Slide-in, and Fullscreen.
Choosing Centered will place your logo above your navigation menu and centered both within the header.
Choosing Centered Inline Logo will place the logo in-line with your nav menu elements, centered between the links.
You can also enable Vertical Navigation from within this section, which will create a drastically new look for your site, putting the navigation bar on the left of your content.
Step 4: Customize the menu
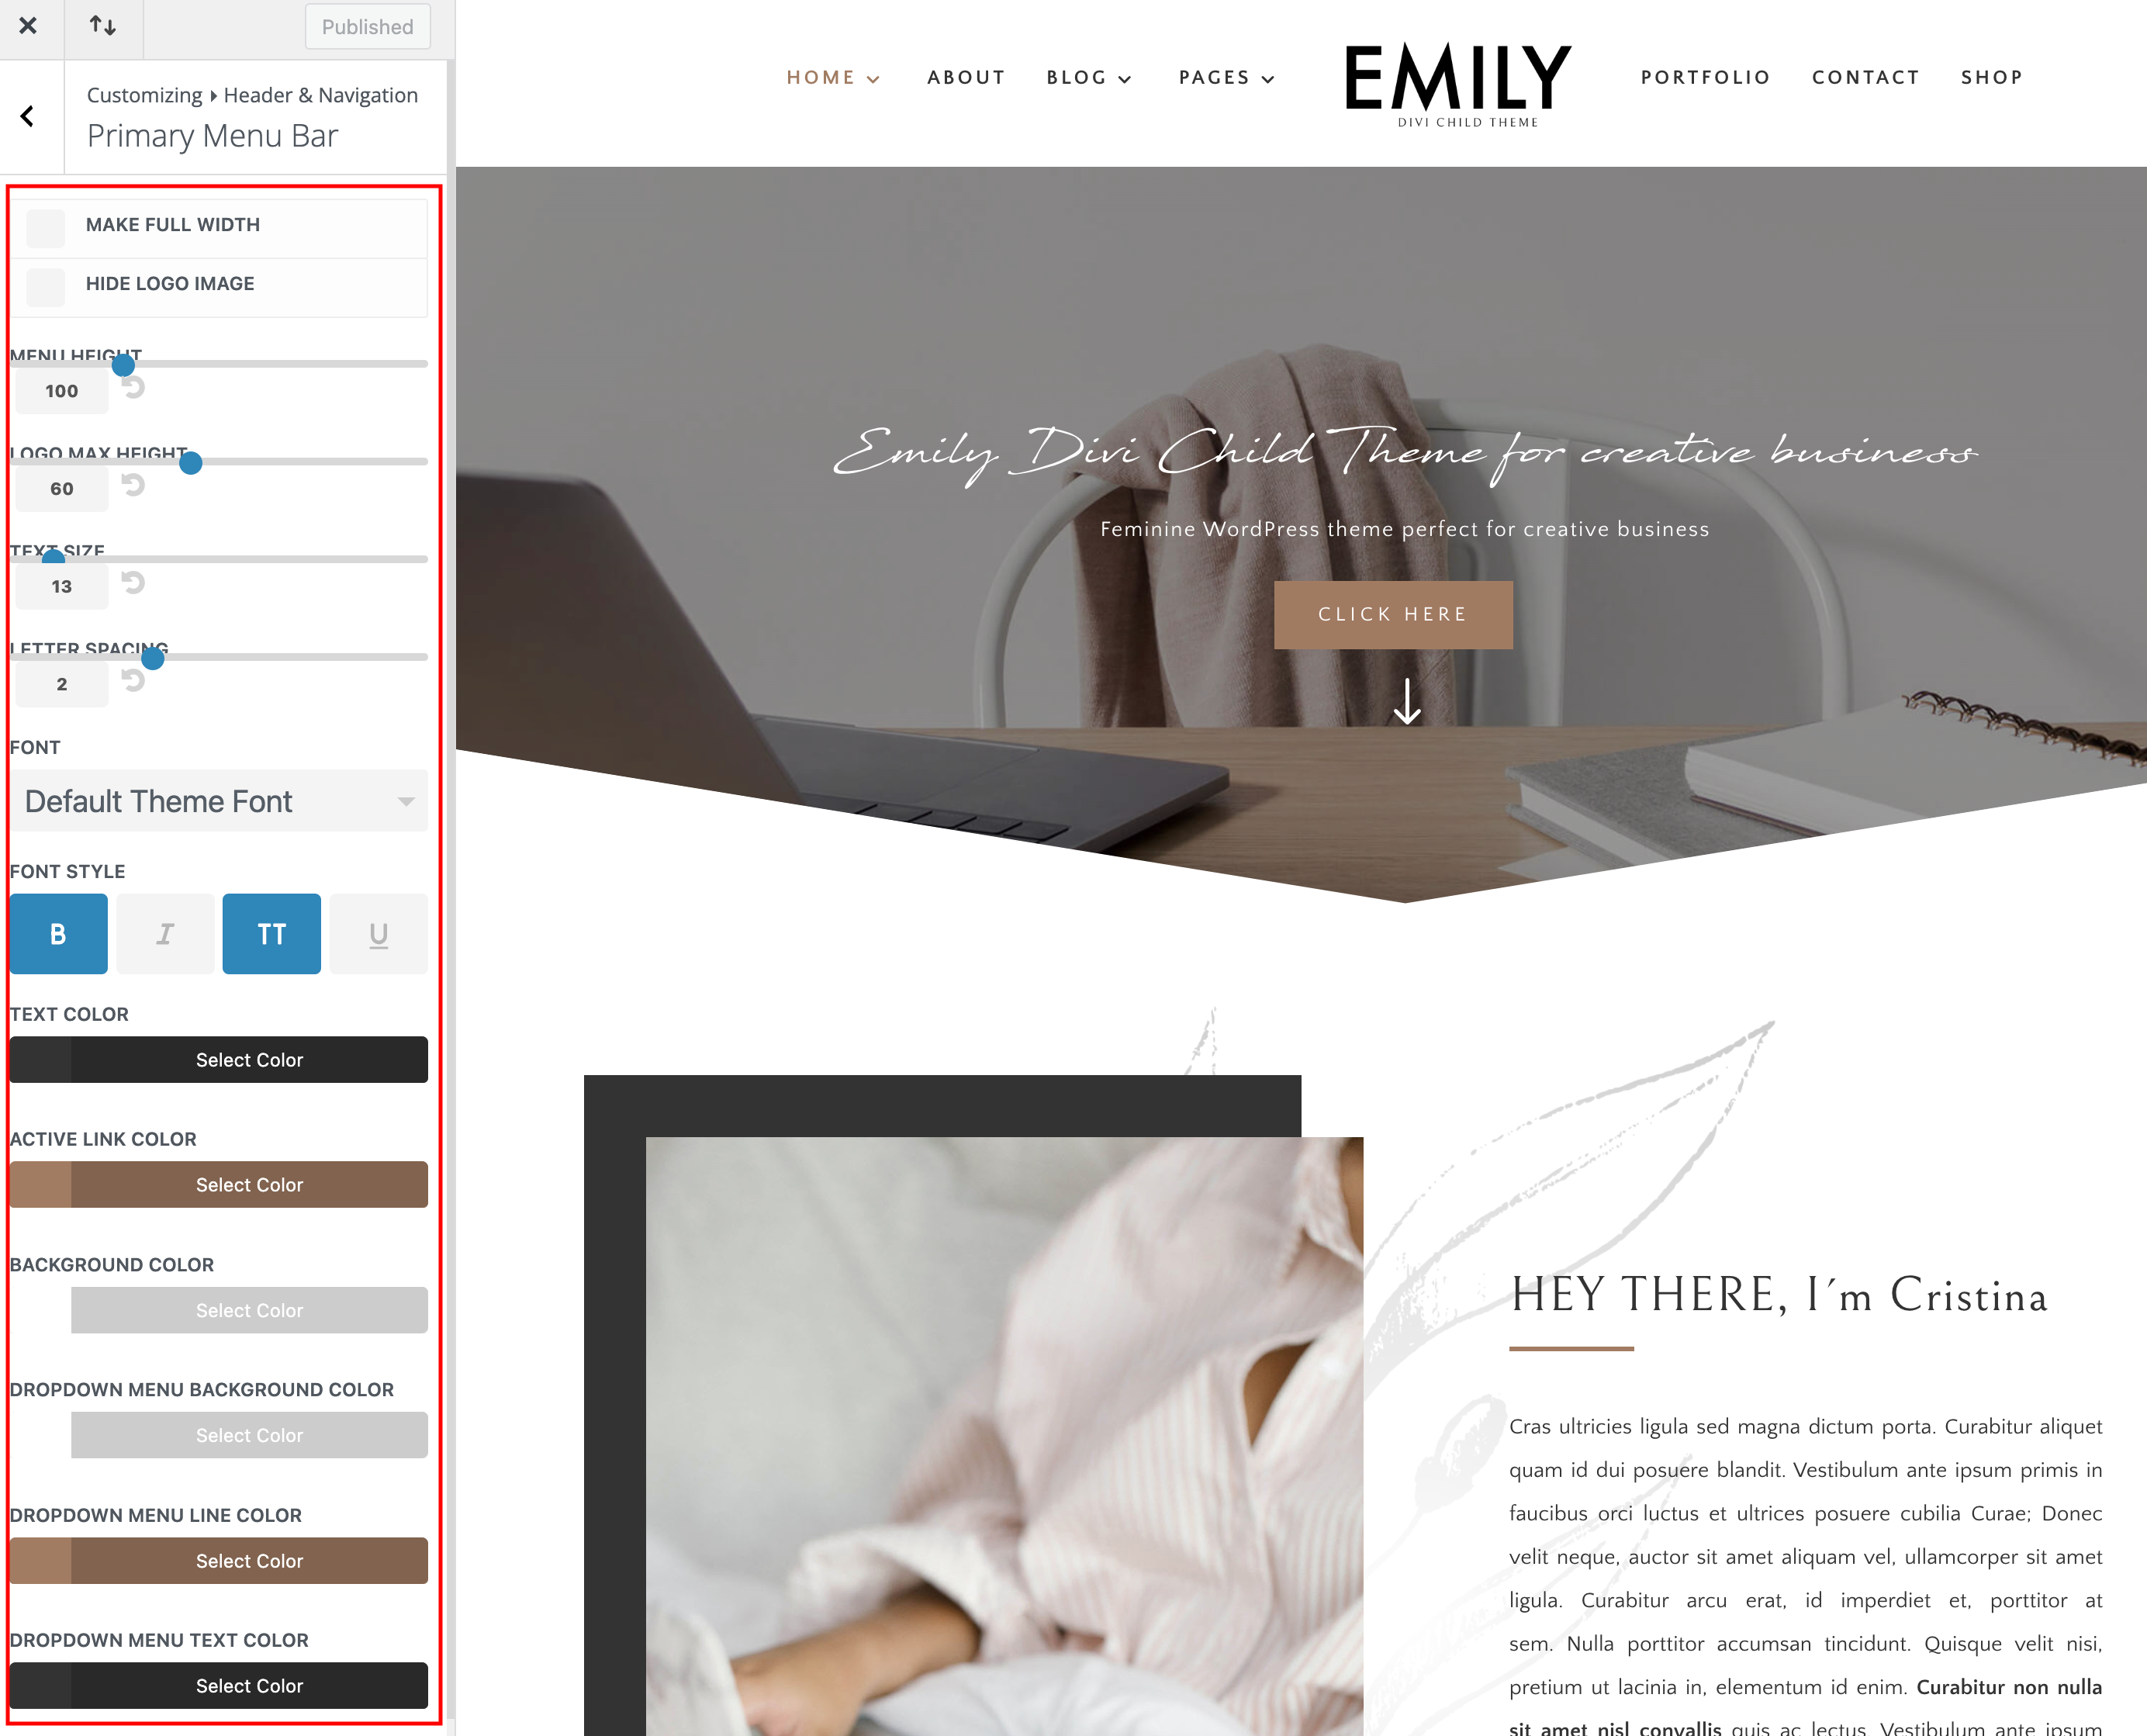
Now that you’ve set up the menu, it is time to give it a nice design. To do so, remain in the Customizer Settings and navigate to Header & Navigation > Primary Menu Bar and enter the following settings: